Saturday, October 16, 2010
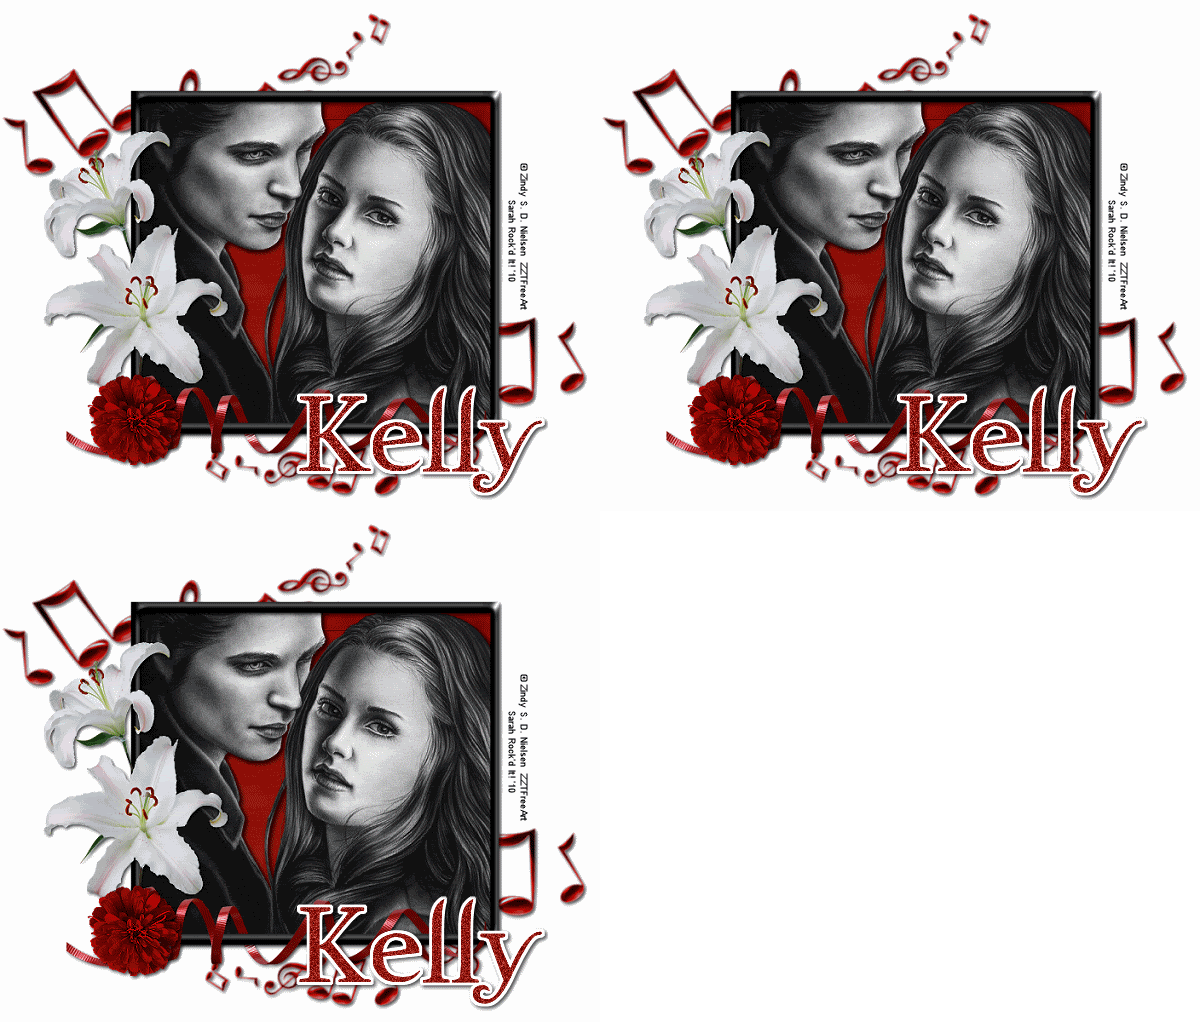
Sweet Twilight
11:06 PM
|
Posted by
♥-Sarah-♥
|
For this tutorial, you’ll need a working knowledge of PSP.
I’m using PSP 9 but any version should work.
This tutorial is my own and any resemblance to any other is purely coincidental.
Supplies for this tutorial:
PSP (any version)
Scrap kit of choice.
I’m using the PTU kit: Twilight from Angel’s Designz.
You can get her kits here: http://angelsdesignz.blogspot.com/
Tube of choice: I’m using the wonderful work of Zindy Nielsen.
This is a freebie tube I got on the site.
You can find these tubes here: http://zindy-zone.dk/
Let’s begin!
Open a new canvas-I use 800x600 & resize when im done.
Using your rectangle tool, make your foreground black and background null.
Your line width should be about 14.
Draw out your rectangle.-Convert to raster.
Effects-3D Effects-And do an inner bevel.
Select a ribbon from your kit. Edit-Copy
Go to your canvas and paste as new layer.
Make any adjustments you need & add your drop shadow.
Next, choose a flower from your kit. I used flower 2. Edit copy.
Go back to your canvas & paste on top of your ribbon layer.
Resize & adjust to your liking then add your drop shadow.
Choose another flower from your kit (I picked the lilies) Edit-Copy
Go back to your canvas & paste under your first flower but over your ribbon layer.
Resize and adjust as needed and drop shadow.
Go to your kit and choose the musical notes. Edit-Copy
Paste into your canvas behind your frame.
Adjust & resize as desired-Duplicate these and mirror
Move to the bottom right hand corner-Add drop shadow
Choose a paper for your kit that you want as the background in your frame.
Edit-Copy
Use your magic wand to click inside the frame
Selections-Modify-Expand by 3
Add new raster layer & Paste INTO selection
Move this layer below your frame layer
Add a drop shadow to your frame layer.
Select your tube-Copy & paste into your canvas.
Position and crop as needed.
Add your drop shadow.
Using your rectangle selection tool, crop the canvas down and resize to where you want it.
Add your Name & copyright info.-Merge all--We are going to add some glitter!
Duplicate your tag 2 times. (You should have 3 layers.)
Use your magic wand to select where you want your glitter. I’m doing the name.
Select your top layer.
Adjust-Add noise-Gaussian-Monochrome-Noise 35%-OK
Select the second layer-Adjust-Add noise-Same settings except change it to 45%
Select third layer-Adjust-Add noise-Same settings except change to 55%
Save as Animation shop image.
Open in Animation shop & save as a GIF file & you’re finished!
Hope you enjoyed this tut. Feel free to send me anything you make with it or email me with questions!
Labels:
PTU Tut
,
twilight tutorial
Subscribe to:
Post Comments
(
Atom
)
Old Temps
Older templates can be downloaded HERE
Background created by Sarah-Scrap kit by Just So Scrappy. Powered by Blogger.
Lables
- 12 Days of Christmas Freebie ( 12 )
- 4th Of July ( 3 )
- Animated ( 16 )
- award ( 6 )
- baby ( 1 )
- blog train ( 1 )
- Caron Vinson ( 3 )
- Christmas ( 22 )
- city ( 1 )
- country ( 1 )
- CT call ( 1 )
- CT Tags ( 17 )
- CU ( 1 )
- CU Freebie ( 5 )
- Easter ( 2 )
- Elias Chatzoudis ( 28 )
- emo ( 5 )
- Facebook cover ( 1 )
- Fall ( 14 )
- forum set ( 2 )
- Frame ( 2 )
- Freebie ( 25 )
- Frieng Gifts ( 2 )
- FTU ( 6 )
- FTU Kit ( 8 )
- FTU tag ( 3 )
- FTU tag. Garv ( 1 )
- FTU Tube ( 4 )
- FTU Tut ( 30 )
- Garvey ( 10 )
- girly ( 1 )
- Gorjuss ( 11 )
- Halloween ( 7 )
- haloween tut ( 6 )
- holiday ( 1 )
- Joel adams ( 4 )
- Jose Cano ( 7 )
- Josh Howard ( 1 )
- Lady Mishka ( 5 )
- Made w. my kits ( 14 )
- Mask ( 1 )
- native ( 1 )
- Nene Thomas ( 1 )
- new year ( 3 )
- NEWS ( 2 )
- No Tube ( 3 )
- pinuptoons ( 3 )
- PTE ( 1 )
- PTU ( 3 )
- PTU CU ( 2 )
- PTU Kit ( 20 )
- PTU tags ( 58 )
- PTU Tut ( 127 )
- RAC ( 29 )
- Rac Tutorial ( 15 )
- Robert Alvarado ( 1 )
- SALE ( 5 )
- School ( 1 )
- Show Off ( 9 )
- Snags ( 2 )
- Spring ( 4 )
- St. Patrick's Day ( 2 )
- Store collab ( 1 )
- Summer ( 19 )
- Template ( 44 )
- Thanksgiving ( 1 )
- tooshtoosh ( 21 )
- tutorial ( 3 )
- twilight tutorial ( 2 )
- Using my kits ( 1 )
- using my temps ( 8 )
- Valentines ( 8 )
- verymany ( 2 )
- Winter ( 8 )
- Zindy ( 2 )
- zlata ( 1 )
Archive
-
▼
2010
(
93
)
-
▼
October
(
20
)
- Thank you & New Tutorial!
- Excuse my mess
- PTU Tut-Boo!
- Fall Dream-PTU Tutorial
- PTU-TooshToosh Autumn Bliss
- New Tag-FTU-Naughty Garv
- PTU Tut-Big Girl Panties
- PTU-SexyRac
- New Tag!-Gobble Gobble!!
- Spoooky Treats Freebie
- PTU Tag-Garv Floral
- Snow Cutie-Tut-
- Sweet Twilight
- Gorjuss Snow Princess.
- Frame Freebie
- A couple more tags
- ♥-Gorjuss Sunflowers-♥
- Gorjuss Vinyard
- DVA-Tag
- Toxic Love Set
-
▼
October
(
20
)
My TOU
By downloading any of my items, you agree to the following TOU:
All items I provide on this blog are my own creations.
Any resemblance to another product is strictly coincidental.
Please do not share anything I create!
Do not claim as your own. Give credit where it is due!
If you use them for challenges, please link back to my blog.
If you use them in tutorials, please link back to my blog.
If you use any of my creations, I would love to see it!! Feel free to email them to me, anytime & I will display them on my blog!!
Blog: http://sarahstagsthings.blogspot.com/
My Email: Smcmanus44@gmail.com
Thank you!!


0 comments :
Post a Comment