Monday, December 24, 2012
12 Days of Christmas Freebie-Day 11
Here is your last freebie from me!!
I hope you have each enjoyed all of my freebies for this 12 days give away =)
I wish you each a very Merry Christmas and a happy, healthy New year!!

A set of two Facebook covers.
Please do not change, add to or take away from.
Click preview for download!
Sunday, December 23, 2012
12 days of Christmas freebies-Day 11
Check out the fab freebies and that Amy & Leah have for you!!
Click the PV's to go there now!


Saturday, December 22, 2012
12 Days of Christmas Freebies-Day 10
Day 10 of freebies here for you!!
Pick up this fab freebie from Amy & Leah's Gimptastic tuts!
Click PV to go there now!

12 Days for Christmas Freebie-Day 9
Sorry this is late--having computer issues..
Here if your freebie from yesterday..
Click the preview to download:

Thursday, December 20, 2012
12 Days of Christmas Freebies-Day 8
Today you can grab your freebies from Amy & Leah!
Click previews to go now!


Wednesday, December 19, 2012
12 Days of Christmas-Day7
Tasha has today's 12 days freebie for you!
Check out her fab kit--
Click to go to her blog now!

Tuesday, December 18, 2012
12 Days of Christmas-Day 6
Today I'm bringing the 12 days freebie!!!!
Click the preview to download!
=)
Dont forget about my 50% off sale at
Whimsical Divas & Heartfelt perfections!!
Dont forget about my 50% off sale at
Whimsical Divas & Heartfelt perfections!!

Monday, December 17, 2012
12 Days of Christmas-Day 5!!
Check out what Amy & Leah have for you today!!
Click their previews to go to their blog for download!


Sunday, December 16, 2012
CT Tag/Tut-Santa's Favorite
Check out this kick butt tag from Tasha using my
"Peppermint Winter" kit!
Fabulous, right?!!!!
Click it to go to her tut.
Thanks so much Tasha!!
♥♥

12 Days of Christmas Day-4
Today's freebie comes from Tasha's Playground.
Click the preview to go there now.

Come back tomorrow for your next freebie!!
Saturday, December 15, 2012
12 Days of Christmas-Day 3!!!
I hope you've all be nice!!
I'm here with today's 12 Days freebie!!
I have a small CU pack for you.
It's an icicle and snow element freebie!
FTU-CU-Credit required when using in a PTU kit, please =)
Click the preview to download =)

Be sure to keep checking back, never know what Santa might bring next
;)
-Don't forget about my 50% off sale at Whimsical Divas & Heartfelt Perfections--through the month of December!-
Friday, December 14, 2012
12 Days of Christmas Freebies-Day 2
Amy and Leah have today's freebies for you!!
Click their previews to go to their blog to download!


Thursday, December 13, 2012
12 Days of Christmas FREEBIES!!!
Tasha's Playground, Amy & Leah's Gimptastic Tuts, and I have once again, teamed up to bring you some wonderful freebies!!
We're doing a 12 days of Christmas blog hop where, each day, on one of our blogs, you will find a PU or CU freebie!!
Be sure to check back daily for your freebie!!
You don't wanna miss them!!
Today's freebie comes from Tasha's Playground!
Click the PV to head on over and grab it up!
Be sure to leave her some mad lovin!!

Wednesday, December 12, 2012
Calm Winter-PTU

For this tutorial, you’ll need a working knowledge of PSP.
I’m using PSP X4 but any version should work.
This tutorial is my own and any resemblance to any other is purely coincidental.
Supplies for this tutorial:
PSP (any version)
PTU Scrap kit-Snow Cold here: http://sinfullycreativescraps.blogspot.com/
Template 133 HERE
Tube by Suzanne Woolcott here: http://www.gorjussarthome.com/store/
You MUST have a valid license to use these tubes!
Do NOT use without a license!
Mask of choice
::Let’s begin::
Open the template
Resize it if you’d like to
(I cropped and resized by 80%)
Delete layers you don’t want to use, including the © layer
Copy papers from the kit and fill each part of the template with them.
You could also flood fill the template shapes with colors to match the kit/tube.
Add drop shadow to each part of the template as you go
In your little circles you want to put close ups of your tube.
Select the circle
Select all
Float
Defloat
Past your tube and position
Selections
Invert
Delete
Select none
Mirror and place on the other side in the other small circle
Merge those two close ups
Change blend mode to Luminance legacy
(you might want to play around with the blend modes to see which you like best)
Now copy and paste all the elements you’d like t include in your tag.
You’ll have to resize them to fit them into your canvas size.
I used the following:
Tree (x4)
Snowflakes
Ornament with ribbon
Snow
Add drop shadow to each element you add.
Once you’re done, copy and paste your tube
Add drop shadow
Merge visible.
Add new layer
flood fill with a darker color from your tag
I used blue
Apply your mask to this layer.
Crop down
Add your name/text
Add your © and save!
Tuesday, December 11, 2012
CT-Tag/tut
I'm late in posting this
*face palm*
But here is a wonderful tag/tut from my good friend Leah from
Gimptastic Tuts.
She used my Peppermint Winter kit for this tag.
Click the tag to go to the tut!
Thanks so much Leah!!
♥

Monday, December 10, 2012
SALE SALE SALE!!
In the spirit of Christmas, I'm having another big sale!!
That's right!
50% off EVERYTHING!!
Grab kits for as low as .75!!!!!

&
Tuesday, December 4, 2012
Snowflake Kisses

For this tutorial, you’ll need a working knowledge of PSP.
I’m using PSP X4 but any version should work.
This tutorial is my own and any resemblance to any other is purely coincidental.
Supplies for this tutorial:
PSP (any version)
Scrap kit of choice.
I’m using the PTU kit: Snowflake kisses by Evol Angel Scrapz
You can get her kits here: http://scrapcandy.creativecandyland.net/
Tube of choice: I’m using Elias Chatzoudis
This is a tube you MUST have a license to use. Don’t use these tubes without a license!
You can find these tubes HERE
Mask of choice
Let’s begin:
Open new image-800*600
Copy and paste a frame from the kit as new layer
Resize if you need to.
Copy and paste your tube
Duplicate the frame layer
Move over your tube
Erase all the frame that covers your tube’s face and any other part you don’t want it to.
Also erase all the parts of your tube that hang beyond your frame.
Add drop shadow to your tube.
Select the bottom frame
Select inside with your magic wand
Selections
Modify
Expand by 4
Copy and paste paper of choice as new layer
Selections
Invert
Delete
Select none
Move below frame
Add drop shadow on the bottom frame
Now add the elements you want to include in your tag.
I used the following:
Snowflakes
Sparkles
Merry Christmas sign
Snowman
Snowman cupcake
Add drop shadow to each element you add.
Crop
Merge visible
Copy and paste another paper from the kit
Move below your tag
Apply your mask to this paper
Add your name and © info
Save!
Sunday, December 2, 2012
New Christmas kit!
Got a new kit up in all three stores.
I didn't know what to name it but I was listening to Christmas music when I was finishing it up & the next song that came on was
"A little Christmas"
--That's how the kit got its name! LOL--
Anyhow, it's tagger-sized
43 Elements and 8 papers

Find it:
•
•
Tuesday, November 27, 2012
CT-Tut
Big thanks to Alisha for this gorgeous tag/tut!
Click tag to go to the tut:

Sunday, November 25, 2012
You elfing me-Tag show off & extras!
Check out this crazy cute tag made by one of the CT girls from
Whimsical Divas,
Kiya!

Isn't this beyond awesome!!!???
Thanks so much Kiya!
Click the tag to snag her extras and the cluster she made with my kit!
Saturday, November 24, 2012
BIG SALE!! Don't miss out!!
Get in on this sale while it lasts!!!
55% off ALL of my products at
Heartfelt Perfections
&
Whimsical Divas!
TWO DAYS ONLY!!!

or
Saturday, November 17, 2012
Dear Santa-PTU

For this tutorial, you’ll need a working knowledge of PSP.
I’m using PSP X4 but any version should work.
This tutorial is my own and any resemblance to any other is purely coincidental.
Supplies for this tutorial:
PSP (any version)
PTU Scrap kit-Step Into Christmas: http://sweetcravingsscraps.blogspot.com/
This is going to be simple. =)
Open a new image 800*600
Copy and paste a frame from the kit
Resize if you need to.
Select inside the frame with the magic wand
Selections
Modify
Expand by 4
Copy and paste a paper as new layer
Selections
Invert
Delete
Select none
Move paper below frame
Add drop shadow to the frame
Copy and paste the gingerbread man
Resize
Position in the center
Add drop shadow.
Now layer on any of the really cute elements from this kit.
I used the following:
Scroll
Red gift
Blue gift
Clock
Gold ornaments
Button swag
Bird
Gold twigs
Copy
Pace
Resize
Position
And add drop shadow to each element
Merge visible
Crop
Resize
Add your name & any © if needed
Save!
New Kit in stores!!
I have a fun new Christmas kit in all of my stores now!
It's a tagger-sized,
ELF themed, kit!
40 Elements and 8 Papers
Great for all those fun Christmas tags!
Personal Use only.
Check it out now!

Tuesday, November 13, 2012
BIG thanks & new CT tags!!
I want to say a big big thank you to my friend, Leah,
from Amy & Leah's Gimptastic Tuts,
for my abso-freakin-lutely FABULOUS blog make-over!!!!
She out-did herself on this one!!!
Thanks so so much for it Leah!!
♥♥♥♥
Now--on to some really great tags from my awesome CT girls!
I'm always amazed with the things they create with my kits.
They really make my kits look good!
LOL
Thanks girls! I really appreciate them working with my kits!
First up is my girl Tasha.
She used my "All my relations' kit to make this way awesome banner for me--
Sporting my Mississippi Choctaw heritage!
Thanks Tasha! I love it!!

Next up--
Alisha made this super cute tag with my 'Harvest Time' kit.
Thanks so much Alisha!

& last, but certainly NOT least...
These great tags are from Kaci using my
'Booga Booga' kit
Thanks Kaci!!


Saturday, November 10, 2012
Freezin'-PTU

For this tutorial, you’ll need a working knowledge of PSP.
I’m using PSP X4 but any version should work.
This tutorial is my own and any resemblance to any other is purely coincidental.
Supplies for this tutorial:
PSP (any version)
Scrap kit of choice.
I’m using the PTU kit: ‘Tis the Season for freezin’
Info on where you can find her kits here: www.amyleahsgimptastictuts.blogspot.com
Template 429 HERE
::Let’s begin::
Open your template
Delete all layers we wont be using
-credits
-word art
-squares
Fill each shape in your template with a paper or color to match the kit.
Select the shape
Select all
Float
Defloat
Add paper as new layer
Selections
Invert
Delete
Select none
Do this for all parts of your template
I used the circular frames in the kit to go over my circles in my template.
I just copied, pasted, & resized them.
Add drop shadow to the frames.
Now you just add the elements from the kit that you want included in the tag.
It has tons of way cute ones to choose from!!
I used :
he holly branches
Holly leaves & berries
Candle lantern
Ornament
Penguin
Word art
Add each element
Add drop shadow
Crop your tag down
Resize
Add name/text & if needed, © info.
Save!
Thursday, November 8, 2012
PTU Tut-Dance!

For this tutorial, you’ll need a working knowledge of PSP.
I’m using PSP X4 but any version should work.
This tutorial is my own and any resemblance to any other is purely coincidental.
Supplies for this tutorial:
PSP (any version)
PTU Scrap kit-Dance for me here: http://sinfullycreativescraps.blogspot.com/
::Let’s begin::
Open a new image 800*600
Copy and paste the mirror element from the kit
Resize if you’d like
Add drop shadow
Copy and paste the purple curtain
Move behind the mirror element
Resize if you need to
Add drop shadow
Copy and paste element 21
I recolored it to purple
Resize
Place behind curtain
Position to the left
Duplicate
Mirror
Add drop shadow to both
Add in any of the other beautiful elements from the kit that you’d like in your tag.
I used the following:
Butterflies
Lamp
Brown bow
Purple roses
Copy
Paste
Resize
Position
Add drop shadow to each one
Copy and paste your tube
I used the cute ballerina girl from the kit.
Add drop shadow.
Crop
Resize
Add any name/text you want on your tag
Add any © info
Save & you’re done!
Wednesday, November 7, 2012
New kit-Peppermint Winter!
I have a new kit in all three of my stores!
(Links to the right)
Tagger size. 40 Elements & 8 Papers.
Winter/Candy cane/Peppermint theme!!
Great for all those Winter tags!!

CT Tut--Apple Pickin' Time
Leah made this beautiful tag/tut with my kit,
Harvest Time.
Click the tag to go to her tut!
Thanks so much Leah!!
♥

Sunday, November 4, 2012
Oink oink, Gobble Gobble

For this tutorial, you’ll need a working knowledge of PSP.
I’m using PSP X4 but any version should work.
This tutorial is my own and any resemblance to any other is purely coincidental.
Supplies for this tutorial:
PSP (any version)
Scrap kit of choice.
I’m using the PTU kit: Turkey Day Protest (By AMY)
Mask of choice
::Let’s begin::
Open a new image 800*600
Copy and paste a frame from the kit
Click inside with your magic wand
Selections
Modify
Expand by 5
Add new layer
flood fill with color to match the kit.
Move below frame
Copy and paste a turkey from the kit
Resize if needed.
Move to the left
Crop so none of it hangs beyond the frame
Duplicate
Mirror
Merge the two turkeys together
Change blend mode to luminance legacy
Apply Unplugged X-interlace
Screen mode
Default settings
Now you can layer all the other elements you’d like to use in your tag on top of your frame.
I used the following:
-Eat more pork (Turkey)
-mixer
-bowl with spoon
-piggy pie
-piggy cupcake
-pumpkin
-rolling pin
-yellow leaf
-banner
Copy
Paste
Resize
Position
Add drop shadow
Merge visible
Copy and paste a paper from the kit
Apply your mask
Move it under the rest of your tag
Merge visible
Add your © info and name
Save!
Tuesday, October 30, 2012
Freebie!!--Masks
These are my first-ever masks!!
I was playing around in Photoshop--which I am currently learning--& I made these.
Hopefully someone can use them for something.
Just right-click and save =)


Saturday, October 27, 2012
Witches Be Crazy
I used a couple of new witch tubes from Toosh Toosh to make this tag.
Aren't these creepy chicks awesome???
Find all the new TooshToosh tubes HERE
Grab a snag if you'd like =)
Happy Halloween!


Wednesday, October 24, 2012
New kit!!--New tuts!!! SALE SALE SALE!!
Time for a new kit!!
This one is Thanksgiving themed, perfect for all those Thanksgiving tags!!
It's tagger-sized with 43 Elements and 8 Papers.
Available at all 3 of my stores!!
Be sure to check out my 45% off SALE at Heartfelt Perfections & Whimsical Divas!

Now for some great new tuts from my awesome CT!!
Click each tag to be taken to the tut!
-From Alisha-
-From Rachel-

Thanks so much for these great tags/tuts girls!!
♥♥♥♥
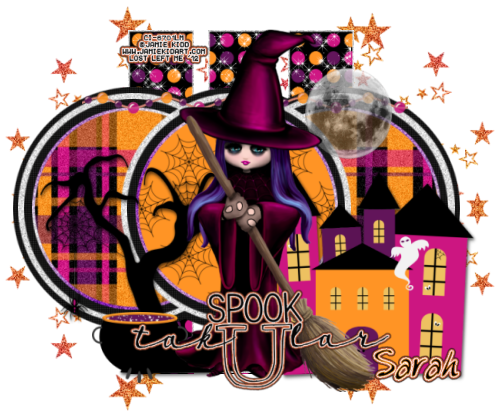
Tuesday, October 16, 2012
Flying Lessons-FTU
For this tutorial, you’ll need a working knowledge of PSP.
I’m using PSP X4 but any version should work.
This tutorial is my own and any resemblance to any other is purely coincidental.
Supplies for this tutorial:
PSP (any version)
FTU Scrap kit-Spooktacular
You can get it here
Tubes from TooshToosh here: www.tooshtoosh.com
You must have a license to use this tube.
Do NOT use this tube without the proper license!!!
Animation shop
::Let’s begin::
Open new image 500*175
Copy and paste a paper for your background, from the kit.
You can also copy & paste any of the other elements you’d like to include in your tag.
I only used the hanging bats b/c I’ll be animating & don’t want my tag too busy.
(Busy tags bother me..lOl)
Add a drop shadow to any of the elements you choose to add.
Copy and paste your tubes where you’d like.
To my witch with the scroll, I added some text to the scroll.
At this point, I added my © info
I added the name as well as a border around my banner.
Once that’s done I’m ready to animate.
I place my flying with in the left hand side of my tag
Copy merged
In Animation Shop (AS)
Paste as new animation
Back to PSP
I move my flying witch down and over a bit
Copy merged
Back to AS
Paste after current frame
Back to PSP--
Continue to move the witch in a “flying” motion,
Copying-merged & pasting after previous frames in AS until the witch is completely out of the frames.
Back in PSP--
Once your flying witch it out of the frame,
Copy and paste another pair of the eyes that came with your witch tube.
(I used the closed eyelids)
Resize them to fit her face.
Copy merged
In AS-
Paste after current frame
In PSP
Hide the eyes you just pasted
Copy merged
Paste after current frame in AS
Now---time to animate
Select all frames
Animation
Frame Properties
Change the # in the box until you’re happy with the speed of your animation.
I think I used 30.
Review your animation.
Once you’re happy with it,
Save!
Monday, October 15, 2012
Toosh O'Ween-FTU

For this tutorial, you’ll need a working knowledge of PSP.
I’m using PSP X4 but any version should work.
This tutorial is my own and any resemblance to any other is purely coincidental.
Supplies for this tutorial:
PSP (any version)
FTU Scrap kit-Gothic Halloween here: http://kittzkreationz.blogspot.com/2011/09/gothic-halloweencoming-soon.html
Template 160 here: http://punkybuttstutorialsii.blogspot.com/
Freebie tubes from TooshToosh here: www.tooshtoosh.com
You must have a license to use this tube, even though it’s free!!
Do NOT use this tube without the proper license!!!
::Let’s begin::
Open the template
Delete all the text layers
Fill each shape of the template with a paper from kit by selecting the shape
Float
Defloat
Copy and paste paper as new layer
Seletions
Invert
Delete
Select none
Do this for each part of your template
Colorize your glittery frames to match the colors of the kit you’re using.
Now we’re going to add our elements from the kit.
I used the following:
Stick
Skull frame
Candles
Pumpkin
Copy
Paste
Resize
Place
& add drop shadow to each element you add.
Next
Copy and paste your tube
Add drop shadow
Crop your tag down
Resize if you need to
Add your © info
Add your name/text
Save!
Subscribe to:
Posts
(
Atom
)


