Sunday, June 26, 2011
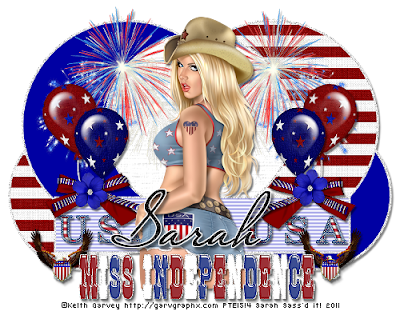
•Miss Independence•
10:35 PM
|
Posted by
♥-Sarah-♥
|
For this tutorial, you’ll need a working knowledge of PSP.
I’m using PSP 9 but any version should work.
This tutorial is my own and any resemblance to any other is purely coincidental.
Supplies for this tutorial:
PSP (any version)
Scrap kit of choice.
I’m using the FTU kit: 4th Of July
You can get her kits here:
Template here: HERE
Artwork by Keith Garvey.
Find these tubes here: ptubesemporium.com
You MUST have the license to use these tubes! DO NOT use w/o a license!!
Let’s begin:
Open your template.
Delete the credits
Select the first circle you want to work with
Select all
Float
Defloat
Copy and paste a paper from your kit as a new layer
Selections
Invert
Delete
Select none.
Do the same for the other circles you want to change.
Fill each with either a paper from the kit or a color to match.
Select your tube
Copy and paste above all layers except the word art.
Add drop shadow of choice.
Merge your word art layer down on top of the glitter WA
Resize WA as desired.
Add drop shadow
Select all the elements from the kit that you want to use.
Copy and paste as you wish in your tag.
Fireworks
Balloons
Flower
Bow
eagle
Add drop shadow to each one you add.
Select the white rectangle on the template
Apply the blinds effect using default settings and the color blue
Now crop your tag down to whatever size you want it.
Add your name and your © info.
Save and enjoy your new tag!
Labels:
FTU Tut
,
Garvey
|
0
comments
-Honey Bee Template-
8:32 PM
|
Posted by
♥-Sarah-♥
|
I love the song 'Honey Bee' by Blake Shelton so I had to make this template.
Hope someone can use it--I'd love to see it if ya do!!
Hope someone can use it--I'd love to see it if ya do!!
Labels:
Template
|
6
comments
Tuesday, June 21, 2011
•Sand in my toes-PTU•
7:31 PM
|
Posted by
♥-Sarah-♥
|
For this tutorial, you’ll need a working knowledge of PSP.
I’m using PSP 9 but any version should work.
This tutorial is my own and any resemblance to any other is purely coincidental.
Supplies for this tutorial:
PSP (any version)
Scrap kit of choice.
I’m using the PTU kit: Sand Between my Toes by Angel’s Designz.
You can get her kits here: http://angelsdesignz.blogspot.com/
Mask of choice
Let’s begin!!
Open a new canvas-800x600
Open the life raft element.
Copy and paste as new layer in your canvas.
Select the inside of your ‘frame’ (the raft)
Selections-
Modify-
Expand by 4
Copy a paper from your kit
Paste as new layer
Selections-
Invert-
Delete
Select none.
Move paper under the ‘frame’
Select the sand element
Copy and paste as new layer
Duplicate
Mirror
Merge down
Copy the palm tree element
Resize if you need to
Place over the ‘frame’ and under the sand
Erase any parts hanging out under the sand.
Add drop shadow
Select any of the elements you want to use
Resize & place them in your tag as you desire.
Add drop shadow to each one.
I used:
Coconuts
Flying seagull
Sailboat
Grass
Bird
Copy another paper from your kit
Paste under all other layers
Apply your mask to this layer
Merge visible
Use your selection tool to crop your tag down & resize as needed.
Add any © info you have as well as any name/text you want on your tag
Save & enjoy!
Labels:
No Tube
,
PTU Tut
|
0
comments
Wednesday, June 15, 2011
•Emolution--PTU•
3:48 PM
|
Posted by
♥-Sarah-♥
|
For this tutorial, you’ll need a working knowledge of PSP.
I’m using PSP 9 but any version should work.
This tutorial is my own and any resemblance to any other is purely coincidental.
Supplies for this tutorial:
PSP (any version)
Scrap kit of choice.
I’m using the PTU kit: EMOLUTIONby Angel’s Designz.
You can get her kits here: http://angelsdesignz.blogspot.com/
Tube of choice: I’m using ZEBRUSH
This is a tube you MUST have a license to use. Don’t use these tubes without a license!
You can find these tubes here: www.picsfordesign.com
Let’s begin!!
Open a new canvas-800x600
Select the frame you want to use.
I used the three part frame and flipped it on its end
Duplicated it
Mirrored
Merge visible
Select inside parts of the frame you are going to fill
Selection
Modify
Expand by 2
Copy a paper from your kit
Paste as new layer
Selection
Invert
Delete
Move below your frame
Do the same for the other 3 parts of the frame w/ a different paper
Add your tube
Add drop shadow
Now select the elements you want to use
Resize them
& paste into your canvas and add drop shadow to each one.
I used:
Nail polish
Bear
Lips
Stars
Skulls
Bow
sparkles
Crop your tag down
Resize and add your copyright info
As well as any name/text you want on your tag
Save & enjoy!
Labels:
PTU Tut
|
0
comments
Tuesday, June 14, 2011
•Taste the rainbow-PTU tut•
11:46 PM
|
Posted by
♥-Sarah-♥
|
((Click to see clear view))
For this tutorial, you’ll need a working knowledge of PSP.
I’m using PSP 9 but any version should work.
This tutorial is my own and any resemblance to any other is purely coincidental.
Supplies for this tutorial:
PSP (any version)
Scrap kit of choice.
I’m using the PTU kit: Taste the rainbow by Angel’s Designz.
You can get her kits here: http://angelsdesignz.blogspot.com/
Tube of choice: I’m using Ismael RAC
This is a tube you MUST have a license to use. Don’t use these tubes without a license!
You can find these tubes here: http://xeracx.net/store/
Template of choice-Template 387 here: HERE
Let’s begin!!
Open your template
Delete the word art layers
Select your background circle on the left with your magic wand
Selections
Modify
Expand by 1
Copy a paper from you kit
Paste into selection
Select none.
Now do the same steps for the other parts of the template.
Fill each shape with a paper from your kit or a color to match.
I added the weave effect to my blue circle and the fritillary effect to my pink circle once I was finished with my flood fill tool.
Now add your tube.
Add drop shadow.
Select your tube’s close up
Copy
Select one of the large square w/ your magic wand
Paste your close up as new layer
Position where you want it.
Selections
Invert
Delete
Select none.
Do the same for the other square
Change your blend mode to your close ups to luminance legacy and add the blinds effect t it.
Now we add our elements to our tag.
Select the elements you want to use.
I used the following:
Cupcake
Glass w/ rainbow drink
Cherries
Bow w/ skull
Stars
‘taste the rainbow’ word art
Swirly sucker
Pill
Resize each element if you need to.
Position to your liking in your tag.
Add drop shadow to each one.
Crop your tag down and resize as you need to.
Add your name/text and copyright info.
Save and enjoy your new tag!!
Labels:
PTU Tut
,
Rac Tutorial
|
0
comments
Sunday, June 12, 2011
•Orange Punk•
12:52 PM
|
Posted by
♥-Sarah-♥
|
For this tutorial, you’ll need a working knowledge of PSP.
I’m using PSP 9 but any version should work.
This tutorial is my own and any resemblance to any other is purely coincidental.
Supplies for this tutorial:
PSP (any version)
Scrap kit of choice.
I’m using the PTU kit: Orange Emo Punk by Angel’s Designz.
You can get her kits here: http://angelsdesignz.blogspot.com/
Tube of choice: I’m using Ismael Rac
This is a tube you MUST have a license to use. Don’t use these tubes without a license!
You can find these tubes here: http://xeracx.net/store/
Template 73-Here: amyleahsgimptastictuts.blogspot.com
Let’s begin!!
Open your template.
Change your canvas size to 800x600
Open all the elements and papers you are going to use for your tag.
Select the first shape you want to work with in your template.
Select it with your magic wand
Selections
Modify
Expand by 1
Copy and paste a paper from the kit as new layer
Selections
Invert
Delete
Select none
Do the same steps with the other shapes of your template.
Fill each one with either a paper from your kit or a color to match your kit/tube.
Now copy and paste the elements you will be using.
Resize each if needed and paste as desired within your tag.
Add drop shadow to each element you add.
I used the skull w/ bow
Bow
Martini glass
Shoe
And sparkles.
When you’re finished adding your elements,
Add your tube. Add drop shadow.
Merge visible.
Crop and resize
Add text/name as well as any copyright info
Save and enjoy your tag!
Labels:
PTU Tut
,
Rac Tutorial
|
0
comments
•Midnight Fantasy--PTU•
10:43 AM
|
Posted by
♥-Sarah-♥
|
For this tutorial, you’ll need a working knowledge of PSP.
I’m using PSP 9 but any version should work.
This tutorial is my own and any resemblance to any other is purely coincidental.
Supplies for this tutorial:
PSP (any version)
Scrap kit of choice.
I’m using the PTU kit: Midnight Escape By Jens Sweet Temptations
Be sure to check out her blog: http://jenssweettemptations.blogspot.com/
Tube of choice: Joel Adams
I got this while he was at CILM.
Find these tubes here: www.cdostore.com
DON'T USE THESE TUBES W/O A LICENSE!!!
Template of choice: Template 70
Find it here: amyleahsgimptastictuts.blogspot.com
Let’s begin:
Open your template. Change canvas size to 800x600
Select one of your shapes of the template with your magic wand.
Selections
Modify
Expand by one.
Copy a paper from your kit
Paste as new layer
Selections
Invert
Delete
Select none.
Do the same thing for the rest of the shapes in the template.
Fill each one with either a paper from your kit
OR a color to match your kit/tube ((which is what I did for the small squares))
Now open the elements from the kit you want to use.
Resize if you need to.
Copy & paste into your tag.
Placing there where you like them best.
I used:
Moon
Mushroom
Little house w/ grass
Music notes
Sparkles
After you have your elements placed, select one of your empty squares.
Copy & paste your tube cropping any parts hanging out from the frame.
Change the blend mode to luminance legacy.
Do the same with your tube for the other two squares.
Now paste your full tube into your tag.
Crop down.
Add your name/text
&& the copyright info.
Save & enjoy your new tag!
Labels:
Joel adams
,
PTU Tut
|
0
comments
Monday, June 6, 2011
•Another Award•
2:41 PM
|
Posted by
♥-Sarah-♥
|
Big thanks to Ronney over at Ditzy Dezigns.
Thanks for thinking of me hun!
The goal of the award is to bring recognition to blogs with minimal followers. Since I have accepted this award, I must pass it on to at least 3 other blogs (but not more than 5) that have inspired me and that I feel deserve much more attention!
The rules are to say "Thank you!" on our blog to the one who awarded us and to link back to their blog. Then, pick the blogs to pass on the award, leave a note on their blog and then list them with links to their blogs, etc....
That being said, I've chosen 4 great blogs:
1.Candylicious Designs
1.Candylicious Designs
All of these guys have been so awesome & I'm so blessed to call them FRIENDS!!
Be sure to check each one out & discover their amazing
tuts, tags, & scraps!!
Thanks again Ditz!!
Labels:
award
|
1
comments
Sunday, June 5, 2011
•Purple Punk-PTU•
9:45 AM
|
Posted by
♥-Sarah-♥
|
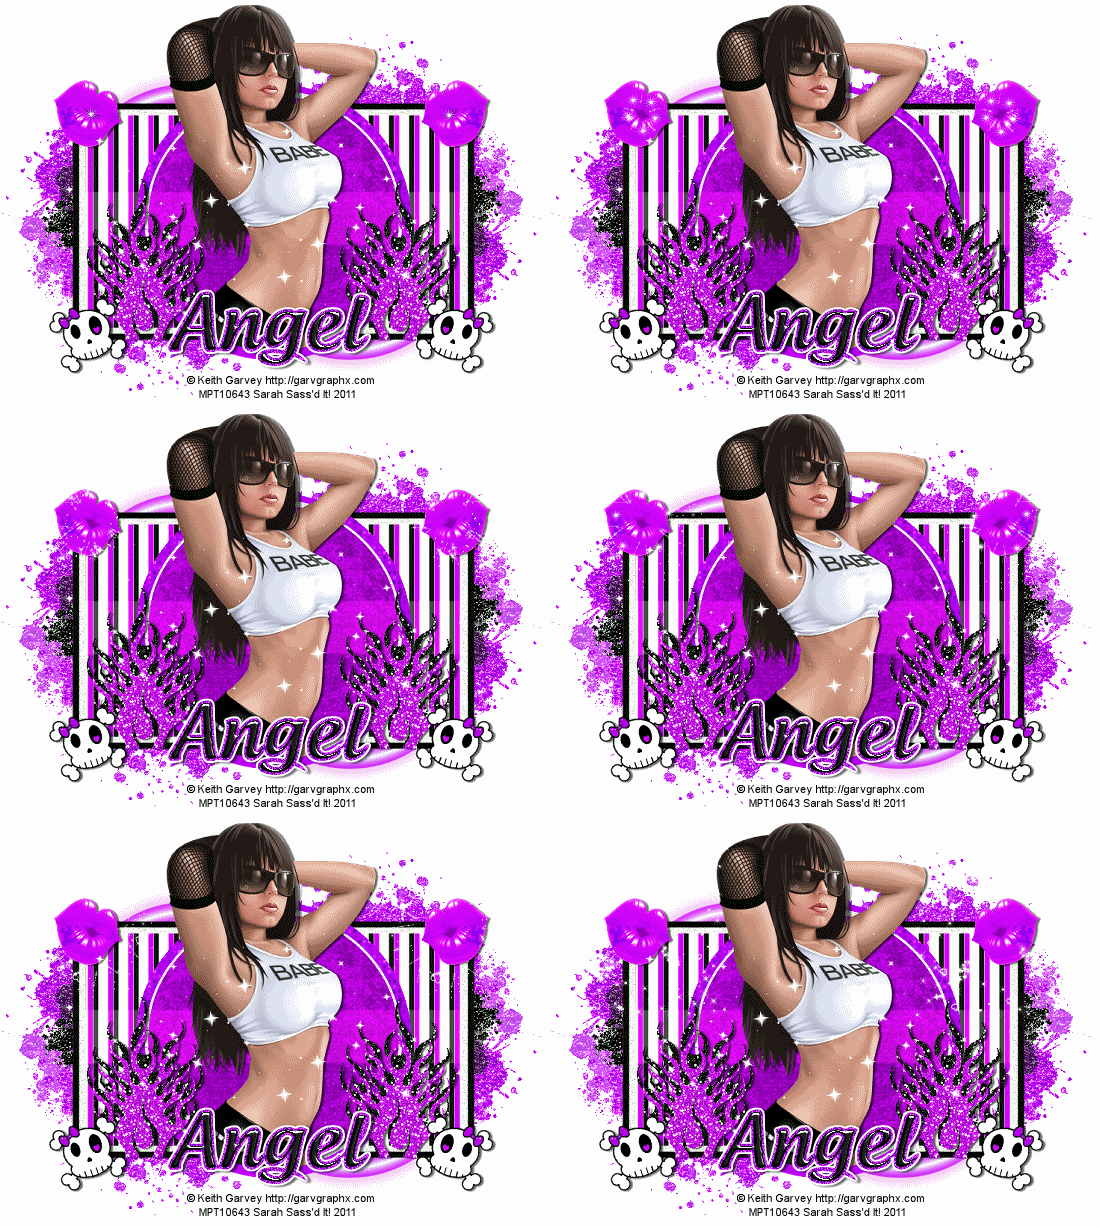
I made this tag w/ Kelly's Purple Emo Punk kit.
Check out her blog for her set of these kits!!
Here's the tag I made:
Labels:
Garvey
,
PTU tags
|
0
comments
Friday, June 3, 2011
Originality: Tag show off!!
8:38 PM
|
Posted by
♥-Sarah-♥
|
Tasha did this wicked tag w/ my Originality template.
She made it into an FTU tut.
Be sure to check out her BLOG to do the tut!
&& Snag the template here on my blog!!
Labels:
FTU Tut
,
using my temps
|
0
comments
•Beach Babe-FTU•
12:56 AM
|
Posted by
♥-Sarah-♥
|
For this tutorial, you’ll need a working knowledge of PSP.
I’m using PSP 9 but any version should work.
This tutorial is my own and any resemblance to any other is purely coincidental.
Supplies for this tutorial:
PSP (any version)
Scrap kit of choice.
I’m using the FTU kit: Summer Bliss.
You can get her kits here: http://gothicinspirations.blogspot.com
Tube of choice: I’m using Elias Chatzoudis
This is a tube you MUST have a license to use. Don’t use these tubes without a license!
I got this tube while he was at MPT but you can find these tubes here: http://www.psptubesemporium.com/
Let’s begin!!
Open a new canvas 800x600.
Use your ellipse tool in a brown color to make a circle.
Apply your blind texture effect.
Select the inside of your circle with your magic wand.
Selections-modify-expand by 7
Copy a paper from the kit.
Paste as new layer
Selections-invert-delete
Move paper below your circle.
Now select the elements you want to use in your tag.
I used:
the hanging sign
The seagull
Palm trees
Flowers
Coconuts
& tiki candle
Resize each of these elements to fit your tag.
Place as desired through your tag.
Add a drop shadow to each one.
Add your tube & add the drop shadow to your tube.
Crop your tag down.
Resize and add your copyright info & any text you want on the tag.
Save and enjoy your new tag!
Labels:
Elias Chatzoudis
,
FTU Tut
|
0
comments
Thursday, June 2, 2011
•Originality Template•
11:45 PM
|
Posted by
♥-Sarah-♥
|
I'm dedicating this newest template to my girl Tasha over at Tasha's Playgound.
The girl does some awesome, ORIGINAL tags & tuts,
that's something that's becoming a rarity in the the PSP world.
So this is for Tasha!! Hehe..
& for those of you copying any one else's tags/tuts, try something NEW--
Use your OWN ideas!!
Labels:
Freebie
,
Template
|
3
comments
Subscribe to:
Posts
(
Atom
)
Old Temps
Older templates can be downloaded HERE
Background created by Sarah-Scrap kit by Just So Scrappy. Powered by Blogger.
Lables
- 12 Days of Christmas Freebie ( 12 )
- 4th Of July ( 3 )
- Animated ( 16 )
- award ( 6 )
- baby ( 1 )
- blog train ( 1 )
- Caron Vinson ( 3 )
- Christmas ( 22 )
- city ( 1 )
- country ( 1 )
- CT call ( 1 )
- CT Tags ( 17 )
- CU ( 1 )
- CU Freebie ( 5 )
- Easter ( 2 )
- Elias Chatzoudis ( 28 )
- emo ( 5 )
- Facebook cover ( 1 )
- Fall ( 14 )
- forum set ( 2 )
- Frame ( 2 )
- Freebie ( 25 )
- Frieng Gifts ( 2 )
- FTU ( 6 )
- FTU Kit ( 8 )
- FTU tag ( 3 )
- FTU tag. Garv ( 1 )
- FTU Tube ( 4 )
- FTU Tut ( 30 )
- Garvey ( 10 )
- girly ( 1 )
- Gorjuss ( 11 )
- Halloween ( 7 )
- haloween tut ( 6 )
- holiday ( 1 )
- Joel adams ( 4 )
- Jose Cano ( 7 )
- Josh Howard ( 1 )
- Lady Mishka ( 5 )
- Made w. my kits ( 14 )
- Mask ( 1 )
- native ( 1 )
- Nene Thomas ( 1 )
- new year ( 3 )
- NEWS ( 2 )
- No Tube ( 3 )
- pinuptoons ( 3 )
- PTE ( 1 )
- PTU ( 3 )
- PTU CU ( 2 )
- PTU Kit ( 20 )
- PTU tags ( 58 )
- PTU Tut ( 127 )
- RAC ( 29 )
- Rac Tutorial ( 15 )
- Robert Alvarado ( 1 )
- SALE ( 5 )
- School ( 1 )
- Show Off ( 9 )
- Snags ( 2 )
- Spring ( 4 )
- St. Patrick's Day ( 2 )
- Store collab ( 1 )
- Summer ( 19 )
- Template ( 44 )
- Thanksgiving ( 1 )
- tooshtoosh ( 21 )
- tutorial ( 3 )
- twilight tutorial ( 2 )
- Using my kits ( 1 )
- using my temps ( 8 )
- Valentines ( 8 )
- verymany ( 2 )
- Winter ( 8 )
- Zindy ( 2 )
- zlata ( 1 )
My TOU
By downloading any of my items, you agree to the following TOU:
All items I provide on this blog are my own creations.
Any resemblance to another product is strictly coincidental.
Please do not share anything I create!
Do not claim as your own. Give credit where it is due!
If you use them for challenges, please link back to my blog.
If you use them in tutorials, please link back to my blog.
If you use any of my creations, I would love to see it!! Feel free to email them to me, anytime & I will display them on my blog!!
Blog: http://sarahstagsthings.blogspot.com/
My Email: Smcmanus44@gmail.com
Thank you!!


