Showing posts with label Elias Chatzoudis. Show all posts
Showing posts with label Elias Chatzoudis. Show all posts
Monday, January 14, 2013
Queen of hearts-PTU

For this tutorial, you’ll need a working knowledge of PSP.
I’m using PSP X4 but any version should work.
This tutorial is my own and any resemblance to any other is purely coincidental.
Supplies for this tutorial:
PSP (any version)
PTU Scrap kit-Mad Hatter here: http://sinfullycreativescraps.blogspot.com/
Tube by Elias Chatzoudis here: www.eliasartshop.com
You MUST have a valid license to use these tubes!
Do NOT use without a license!
Mask of choice
::Let’s begin::
Open new image 800*600
Copy and paste a frame from the ki
Resize if you need to
Select inside the frame with the magic wand
Selections
Modify
Expand by 4
Copy and paste a paper from the kit as new layer
Selections
Invert
Delete
Select none
Move paper below the frame
Copy your close up of your tube
Select the paper layer
Select all
Float
Defloat
Paste your close up
Selections
Invert
Delete
Select non
Change blend mode of your close up to luminance legacy
Apply the blinds texture to this layer or any other filter you’d like.
Copy and paste the elements you want inside your frame
I use the grassy hill and the grass with the mushrooms
Add drop shadow to each
Copy and paste the other elements youd like to include on your tag.
I used the following:
Stack of books
Chess piece
Key
Warped clock
Add drop shadow to each element
Now copy and paste your full tube
Add drop shadow to it.
Once all is finished, crop your tag down
Resize
Add your copyright info as well as name/text
Save!
Tuesday, December 4, 2012
Snowflake Kisses

For this tutorial, you’ll need a working knowledge of PSP.
I’m using PSP X4 but any version should work.
This tutorial is my own and any resemblance to any other is purely coincidental.
Supplies for this tutorial:
PSP (any version)
Scrap kit of choice.
I’m using the PTU kit: Snowflake kisses by Evol Angel Scrapz
You can get her kits here: http://scrapcandy.creativecandyland.net/
Tube of choice: I’m using Elias Chatzoudis
This is a tube you MUST have a license to use. Don’t use these tubes without a license!
You can find these tubes HERE
Mask of choice
Let’s begin:
Open new image-800*600
Copy and paste a frame from the kit as new layer
Resize if you need to.
Copy and paste your tube
Duplicate the frame layer
Move over your tube
Erase all the frame that covers your tube’s face and any other part you don’t want it to.
Also erase all the parts of your tube that hang beyond your frame.
Add drop shadow to your tube.
Select the bottom frame
Select inside with your magic wand
Selections
Modify
Expand by 4
Copy and paste paper of choice as new layer
Selections
Invert
Delete
Select none
Move below frame
Add drop shadow on the bottom frame
Now add the elements you want to include in your tag.
I used the following:
Snowflakes
Sparkles
Merry Christmas sign
Snowman
Snowman cupcake
Add drop shadow to each element you add.
Crop
Merge visible
Copy and paste another paper from the kit
Move below your tag
Apply your mask to this paper
Add your name and © info
Save!
Tuesday, August 28, 2012
Autumn's Kiss-PTU

(click for clear view)
For this tutorial, you’ll need a working knowledge of PSP.
I’m using PSP X4 but any version should work.
This tutorial is my own and any resemblance to any other is purely coincidental.
Supplies for this tutorial:
PSP (any version)
Tube/Image by Elias Chtzoudis
You MUST have a license to use this tube. Do NOT use this tube w/o the proper license!
These images are now available here: www.eliasartshop.com
PTU Scrap kit-Autumn’s Kiss here: www.tashasplayground.blogspot.com
Open new image 800*600
Copy and paste frame of choice from the kit.
Select the inside w/ magic wand
Selections
Modify
Expand by 5
Copy and paste a paper from the kit
Selections
Invert
Delete
Select none
Move below frame.
Copy and paste the leaf circle below the paper you just pasted.
Move it to the right side of the frame
Duplicate
Mirror
On top of the frame, copy and paste any of the other beautiful elements from this kit that you’d like to include in you tag.
I used the following::
-basket
-bird
-branch 2
-cage
-dead grass
-flowers
-leaf scatter
-sparkles
Copy
Paste
Position
Add drop shadow to each element
Copy and paste your tube.
Add drop shadow
Duplicate tube layer
Move this overtop your paper layer
Apply mura’s meister copies
-wallpaper/rotate default settings
Select paper layer
Float
Defloat
Select your tube layer that you just applied copies to
Selections
Invert
Delete
Select none
Change blend mode to soft light
Merge visible layer
Crop
Resize
Add © info
Add your name
Save!
Thursday, August 23, 2012
Love yourself-PTU

For this tutorial, you’ll need a working knowledge of PSP.
I’m using PSP X4 but any version should work.
This tutorial is my own and any resemblance to any other is purely coincidental.
Supplies for this tutorial:
PSP (any version)
Scrap kit of choice.
I’m using the PTU kit: ‘Love Yourself’ by Angel’s Designz.
You can get her kits here: http://angelsdesignz.blogspot.com/
Tube of choice: I’m using Elias Chatzoudis
This is a tube you MUST have a license to use. Don’t use these tubes without a license!
I got this tube at MPT but you may now find his tubes here:
Open new image 800*600
Open a paper of choice
Use your rounded rectangle select tool to cut out a piece of that paper
Cut
Paste into your canvas as new layer
Open up on of the bracket elements
Copy
Paste on top of the paper
Resize so it fits like mine does in the tag, on the end
Once you have it the right size,
Duplicate
Mirror
Select the paper layer
Selections
Select all
Float
Defloat
Copy and paste the close up of your tube as new layer
Selections
Invert
Delete
Select none
Add drop shadow
Copy and paste the sparkles
Now just add any of the other elements you want to include
I used the following:
Paper
water bottle
Thermos
Weights (which I recolored to match my tube)
Vitamins
Bars
Flower border
Copy
Paste
Resize
Position
Now add drop shadow to all layers
Crop down
Add © info
Add your name
Save!
Sunday, July 1, 2012
Secret Getaway-PTU

((Click for clear view))
For this tutorial, you’ll need a working knowledge of PSP.
I’m using PSP 9 but any version should work.
This tutorial is my own and any resemblance to any other is purely coincidental.
Supplies for this tutorial:
PSP (any version)
Scrap kit of choice.
I’m using the PTU kit: Secret Getaway by Angel’s Designz.
You can get her kits here: http://angelsdesignz.blogspot.com/
Tube of choice: I’m using Elias Chatzoudis
This is a tube you MUST have a license to use. Don’t use these tubes without a license!
You can find these tubes here: www.psptubesemporium.com
((I got this tube while he was at MPT))
Open new canvas 800*600
Copy and paste a frame from the kit
Select inside w/ your magic wand
Selections
Modify
Expand by 4
Copy and paste paper of choice
Selections
Invert
Delete
Select none
Move below frame
Add drop shadow to the frame
Copy and paste the water element above the frame layer
Copy and paste boat
Add drop shadow
Open any of the other fab elements from the kit that you want to use
Copy
Paste
Resize
Position
Add drop shadow
I used the following::
Netting
Sparkles
Towel w /flower
Flowers
Crushed shells
Palm tree
Once everything is how you like it,
Copy and paste your tube
Add drop shadow
Crop your tag and resize if you need to
Add your © info and your name/text.
Save and enjoy your new tag!
Tuesday, June 5, 2012
Breezy Babe-PTU

(click for clear view)
For this tutorial, you’ll need a working knowledge of PSP.
I’m using PSP X4 but any version should work.
This tutorial is my own and any resemblance to any other is purely coincidental.
Supplies for this tutorial:
PSP (any version)
Tube/Image by Elias Chatzoudis
You MUST have a license to use this tube. Do NOT use this tube w/o the proper license!
These images are now available here: www.psptubesemporium.com
PTU Scrap kit-Summer Breeze here: www.tashasplayground.blogspot.com
Xero-Radiance
Mask of choice
Open new image 800*600
Copy and paste frame if choice.
I’m using the ship wheel as my frame.
Resize it if you need to. About 80% is what I did.
Elect inside of the wheel w/ your magic wand
Selections
Modify
Expand by 4
Copy and paste a paper of choice from the kit
Selections
Invert
Delete
Select none
Move below frame.
Add drop shadow to your frame
Now with your paper layer active
Selections
Select all
Copy and paste your close up
Position
Selections
Invert
Delete
Select none
Add drop shadow
Apply Xero radiance (if you want) with the default settings.
Change blend mode to luminance legacy
Copy and paste your water splash element next
Resize
Position
Erase any part of it hanging beyond your frame.
Now the fun part J
Copy and paste all the elements you want to include in your tag.
This kit is FULL of fabulous elements to use!!!
Change it up and make this tag your own!!
::I used::
Sandcastle
Coconut (x2)
Lime slices(x2)
Limes (x2)
Blue flower (x2)
Vine w/ leaves
& drink
Once you’re happy w/ all of your elements
Add drop shadow to each one
Copy and paste your full tube
Add drop shadow
Merge visible.
Copy and paste another paper of your choice from the kit.
Move below the rest of the tag.
Apply your mask to this layer.
Crop down
Resize
Add your © and your name
Save & enjoy your new tag!
Monday, May 14, 2012
Ftu banner show off
Monday, March 19, 2012
-Rawker girl-

For this tutorial, you’ll need a working knowledge of PSP.
I’m using PSP X4 but any version should work.
This tutorial is my own and any resemblance to any other is purely coincidental.
Supplies for this tutorial:
PSP (any version)
Tube/Image by Elias Chatzoudis.
You MUST have a license to use this tube. Do NOT use this tube w/o the proper license!
These images are available here: www.psptubesemporium.com
PTU Scrap kit-Rock On here:www.candyliciousdesignz.blogspot.com
Open new image 800x600
Copy the filmstrip element
Paste as new layer
Use your magic wand to select the inside rectangles in the film strip.
Selections
Modify
Expand by 2
Copy a paper from the kit
(I used two different papers to fill mine)
Paste as new layer
Selections
Invert
Delete
Select none
Move below the film strip
Add drop shadow to your film strip
Copy and paste the double frame element as new layer
Move below all the other layers
Duplicate
Mirror
Fill the inside of the frames w/ papers from the kit.
Add drop shadows to the frames
Copy and paste your tube as new layer above all other layers
Add drop shadow of choice.
Now copy and paste all the elements you want to use from the kit.
Resize
Position
And add drop shadow to each one you add.
I used the following:
Blue and pink doodle
Bow
Musical scale & notes
Cupcake
Disk
‘Rock Star’ word art
Once everything is placed, crop down your tag.
Resize
Add your name/text/ & © info.
Save & enjoy your new tag!
Tuesday, December 13, 2011
-Santa Express-PTU

For this tutorial, you’ll need a working knowledge of PSP.
I’m using PSP 9 but any version should work.
This tutorial is my own and any resemblance to any other is purely coincidental.
Supplies for this tutorial:
PSP (any version)
Scrap kit of choice.
I’m using the PTU Kit: Santa Express by Angel’s Designz.
You can get her kits here: http://angelsdesignz.blogspot.com/
Tube of choice: I’m using the wonderful work of Elias Chaztoudis
This is a tube you MUST have a license to use. Don’t use these tubes without a license!
Find it here: www.psptubesemporium.com
Template (w/ candy canes on it) by Melissa here: HERE
Let’s Begin:
Open your template
Delete the © info
Delete your candy canes as well (unless you want to use them)
Select each shape in your template and fill w/ a paper or color of your choice.
Do this by:
Select your shape
Select all
Float
Defloat
Copy and paste paper
Selections
Invert
Delete
Select none
Do this for each of your sections of your template
Now add your tube
Add drop shadow of choice
Add your elements
I used the following:
-Hanging balls
Mistletoe
Present1
Present 2
Teddy bear
Stocking
Snowflake doodle
snow globe
&& any other elements you want to include.
Change it up! Make it your own!
Add © info and any names or text
Save & enjoy your new tag!
MERRY CHRISTMAS
Tuesday, November 15, 2011
-Christmas Cutie-

(Click for clear view)
For this tutorial, you’ll need a working knowledge of PSP.
I’m using PSP 9 but any version should work.
This tutorial is my own and any resemblance to any other is purely coincidental.
Supplies for this tutorial:
PSP (any version)
Scrap kit of choice.
I’m using the FTU Kit: An Abominable Christmas
You can get her kits here: http://kittzkreationz.blogspot.com/
Tube of choice: I’m using the wonderful work of Elias Chatzoudis
This is a tube you MUST have a license to use. Don’t use these tubes without a license!
You can find it here: www.psptubesemporium.com
Christmas mask by Faith here: HERE
Let’s Begin:
Open a new canvas-800c600--we’ll crop later.
flood fill white
Copy & paste the wreath from the kit
Select the inside of the wreath w/ your magic wand
Selections
Modify
Expand by 7
Add new raster layer
flood fill w/ a color to go w/ the kit (I used red)
Select none
Move below your wreath.
Copy & paste the close up of your tube
Crop so it fits inside the wreath
Change blend mode to luminance legacy
Copy & paste your full tube over top of your wreath
Add drop shadow
Now we add the elements we want to use.
Use the ones you like..there are TONS in this great kit!
I used the following:
Elf sign
Penguin
Light bubbles
Bells
Red ribbon
Copy & paste each element
Position where you like
Add drop shadow to each
Close off visibility of your white back ground layer
Merge visible
Now copy & paste a paper of your choice from your kit
Move under your merged tag
Apply your mask to this layer
You might have to play w/ it a bit to make it fit how you want.
Once it’s set, merge group
Crop down
Reize
Add © info & your name
Select your mask layer
Adjust
Add noise
Gaussian
35%
Edit
Copy merged
Paste as new animation in AS
Back to PSP
Undo
Add noise
Same settings but change to 45%
Edit
Copy merged
Add after current frame in AS
Back to PSP
Undo
Add noise
Same settings but change to 55%
Edit
copy merged
Paste after current frame in AS
View animation
If you like it, save & Ta-da! You have a new tag!
Thanks for doing my tut!
Monday, September 26, 2011
-Spooky Sweet-PTU

Sunday, September 25, 2011
-Here Kitty Kitty-PTU

-click for clear view-
For this tutorial, you’ll need a working knowledge of PSP.
I’m using PSP 9 but any version should work.
This tutorial is my own and any resemblance to any other is purely coincidental.
Supplies for this tutorial:
PSP (any version)
Scrap kit of choice.
I’m using the PTU kit: Copy Cats2 by Angel’s Designz.
You can get her kits here: http://angelsdesignz.blogspot.com/
Tube of choice: I’m using Elias Chatzoudis
This is a tube you MUST have a license to use. Don’t use these tubes without a license!
You can find these tubes here: www.psptubesemporium.com
Template 44 here: HERE
Open your template
Delete the © layer
Select the rectangles w/ your magic wand
Copy a paper from your kit
Paste as new layers
Selections
Invert
Delete
Select none
Select the little squares w/ your magic wand
Copy a paper from your kit
Paste as new layer
Selections
Invert
Delete
Select none
Now copy & paste your tube as new layer
Add drop shadow.
Copy & paste the elements you want to use from the kit
Resize and place how you like in your tag.
Make it your own!
I used the following:
Fish bone
Knot ribbon
Milk bottle
Pink paw print
Splatter
Sparkles1
Add drop shadow to each element you add.
Crop down
Resize
Add name & © info.
Save & enjoy your new tag.
Tuesday, September 13, 2011
-Spooks 4 Treats-PTU

For this tutorial, you’ll need a working knowledge of PSP.
I’m using PSP 9 but any version should work.
This tutorial is my own and any resemblance to any other is purely coincidental.
Supplies for this tutorial:
PSP (any version)
Scrap kit of choice.
I’m using the PTU kit: Spooks for treats by Angel’s Designz.
You can get her kits here: http://angelsdesignz.blogspot.com/
Tube of choice: I’m using Elias Chatzoudis
This is a tube you MUST have a license to use. Don’t use these tubes without a license!
You can find these tubes here: www.psptubesemporium.com
Template37 here: http://paradisepspdesigns.blogspot.com
Open your template
Delete the © layer
Delete the dotted circle
Select one of your background rectangles w/ your magic wand
Selections
Modify
Expand by 1
Copy a paper from the kit
Paste as new layer
Selections
Invert
Delete
Select none
Add drop shadow
Do the same for the rest of your shapes in your template.
Fill each w/ either paper from your kit or a color to match it.
Select the elements you want to use in your tag
Resize if needed
I used the following:
Fencing
Spider web
Bat
candy corn sucker
Sparkles
Lights
Cupcake
Couldron
Jack-o-lantern
Haunted houses
Purple and black doodle
*REMEMBER*
You can make this tag your own!! Change it up a bit if you want!
Add drop shadow to each element you add
Now we add our tube
Add drop shadow
Crop down using our rectangle selection tool
Add your name/text
Add your © info
Save & enjoy your new tag!
Monday, September 5, 2011
-Happy Halloweenie!!-PTU

-Click tag to view clear © info-
For this tutorial, you’ll need a working knowledge of PSP.
I’m using PSP 9 but any version should work.
This tutorial is my own and any resemblance to any other is purely coincidental.
Supplies for this tutorial:
PSP (any version)
Scrap kit of choice.
I’m using the PTU kit: Halloweenie
You can find it here: HERE
Template by Deb here: HERE
Tube: I’m using the awesome art of : Elias Chatzoudis
You *MUST* have a license to use these tubes! Do NOT use them w/o a proper license!
You can find these tubes here: www.psptubesemporium.com
Let’s begin!!
Open your template
Delete the © layer
Delete the text in your template
Select your main rectangle in the background w/ your magic wand.
Selections
Modify
Expand by 1
Select the first paper you want to use from your kit
Copy it
Paste as new layer
Selections
Invert
Delete
Select none
Select the little white squares and flood fill each w/ a color to match your kit and tube.
Apply the weave texture to each of these square using these settings:
Gap size:1
Width:8
Opacity:1
Weave & Gap color: white
Fill gaps checked.
-ok-
Copy and paste your tube
Crop so that she fits inside the circle
Now select the elements you want to use in your tag.
Open each and resize as you need to
Copy then and paste in your tag the way you like.
Remember, you can make this tag your own!!
I used the following elements:
Bow
Flower
Fencing
Keep out sign
Cat
Jack-o-lantern
Sparkles
Spider web
Add a drop shadow to each layer to give your tag depth.
Crop down
Resize if you need to
Add your © info and your name/text
Save & enjoy your new tag!
Thanks for doing my tut.
I also made this tag using the same kit.
Thanks Vicki for the fab kit!!

Sunday, August 28, 2011
-Sexy Fairy-PTU

For this tutorial, you’ll need a working knowledge of PSP.
I’m using PSP 9 but any version should work.
This tutorial is my own and any resemblance to any other is purely coincidental.
Supplies for this tutorial:
PSP (any version)
Scrap kit of choice.
I’m using the PTU kit: Star Struck Collab
You can find it here: www.pinkprincessscraps.blogspot.com
Template here: HERE
Tube: I’m using the awesome art of Elias Chatzouidis
You *MUST* have a license to use these tubes! Do NOT use them w/o a proper license!
You can find these tubes here: www.psptubesemporium.com
Let’s begin!!
Open your template
Delete the © layer
Delete the text in your template
Select the first paper you want to use from your kit
Copy it
Select one of your small background circles of your template w/ your magic wand
Paste paper as new layer
Selections
Invert
Delete
Select none
Do this for the opposite circle as well
Recolor the glitter to mach the rest of your tag if you need to.
Select the bigger circle w/ your magic wand
Copy another paper from your kit
Paste as new layer
Selections
Invert
Delete
Select none
Select the inside of your little circles w/ the magic wand
Flood fill the insides of each circle w/ a color to match your kit/tube
Do not de select
Copy your tube
Paste as new layer over the little circles
Selections
Invert delete
Select none
Mirror your tube & adjust so it’s in the opposite circle.
Change the blend mode of both tubes to luminance legacy
Select the inside of your big circle & do the same steps you did for your small circle.
Placing the close up of your tube in the center
Recolor the mask in the background to match your tube/kit
( changed mine to pink)
Floodfill the outer rectangle w/ a color to match your kit/tube (mine is pink)
The inside rectangle I flood filled w/ black
Now select the elements you want to use in your tag:
I used-
Netting
Pink bow
Stars
Flower element
& star
Paste each element as you like in your tag
Add drop shadow to each
Crop down
Resize
And ass your © & your name/text
Save & enjoy
Tuesday, August 16, 2011
-Fall Fever-FTU

((Click tag for ©))
For this tutorial, you’ll need a working knowledge of PSP.
I’m using PSP 9 but any version should work.
This tutorial is my own and any resemblance to any other is purely coincidental.
Supplies for this tutorial:
PSP (any version)
Scrap kit of choice.
I’m using the PTU kit: Autumn Harvest
You can find it here: www.pinkprincessscraps.blogspot.com
Tube of choice: I’m using is a LIMITED EDITION by Elias Chatzoudis
This is a tube you MUST have a license to use. Don’t use these tubes without a license!
You can find these tubes here: www.psptubesemporium.com
Template 90 which you can find here: www.horseplayspasture.com
Let’s begin!!
Open your template
Delete the © layer
Select your background rectangle w/ your magic wand
Copy a paper from your kit
Paste as new layer
Selection
Invert
Delete
Select none
Do the same for the other shapes in your template,
Filling each one with a paper from your kit OR a color to match.
Next, select the elements you want to use
Copy and place as desired through your tag.
I used element 59- leaves for behind my large rectangle.
Duplicated it
Mirror
Flip
Adjusted to my liking and add drop shadow to each one
I filled my circles with the face of my tube like this
Select the circle you want to work with
Select all
Selections
Float
Defloat
Paste tube close up as new layer
Selections
Invert
Delete
Select none
Change the blend mode to your liking.
I did this for each circle.
Add your other elements:
Tree-element 39
Fence-Element 9
Wheel barrow-element 5
Butterfly-Element 40
Two leaves
And flower of choice
Place each element as you like
Add drop shadow to each one
Add your full tube on top of all other layers.
Crop and resize as needed
Add © info
& any text/name you want
Save & enjoy!
Thanks for doing my tut!!
Tuesday, July 5, 2011
-Mermaid Dreams-FTU-
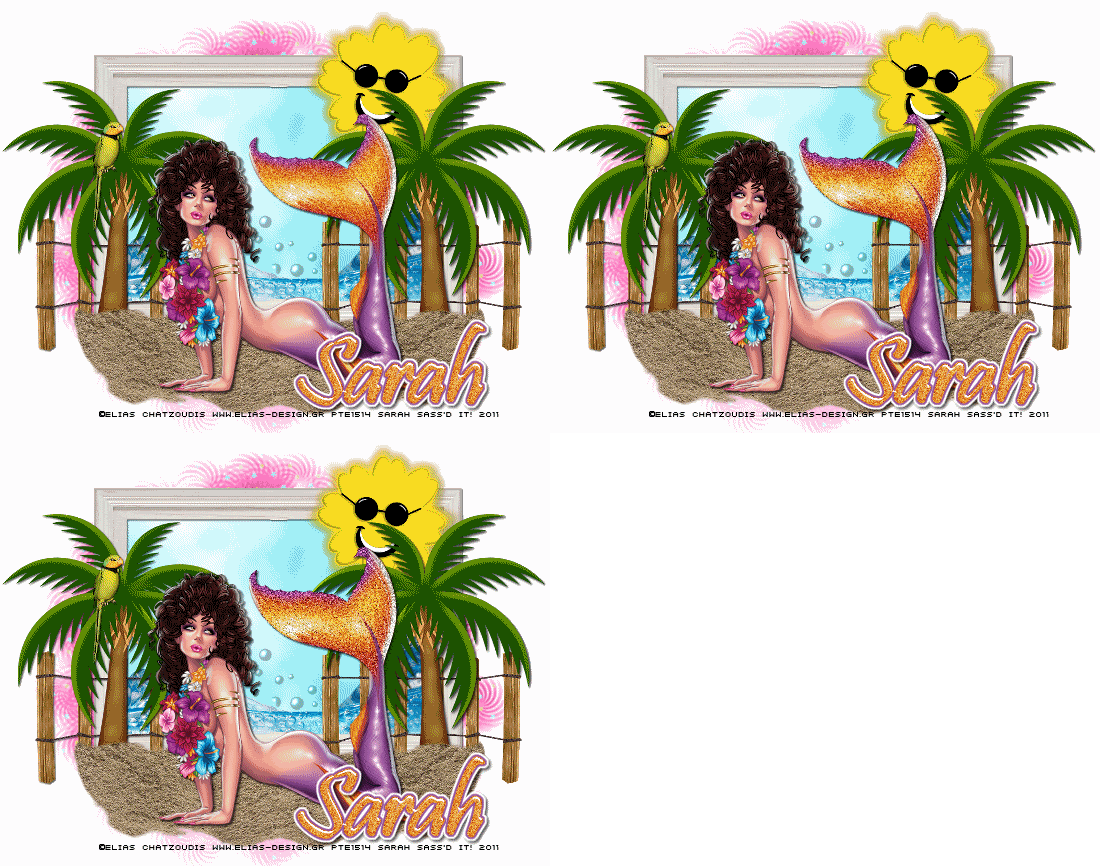
(click for clear view)
For this tutorial, you’ll need a working knowledge of PSP.
I’m using PSP 9 but any version should work.
This tutorial is my own and any resemblance to any other is purely coincidental.
Supplies for this tutorial:
PSP (any version)
Scrap kit of choice.
I’m using the FTU kit: Cool Summer
You can get her kits here: http://scrapsdimensions-dorisnilsa.blogspot.com
Tube of choice. I’m using is by Elias Chatzoudis.
But you can find these tubes here: http://psptubesemporium.com/
You MUST have a license to use these tubes. Don’t use them without a license!
Mask 194 here: http://gemstagginscraps.blogspot.com
Let’s begin:
Open a large canvas (800x600--or bigger)
Select the window element.
Resize and paste as new layer.
(I erased the middle of my window frame)
Select the inside of the window w/ your magic wand
Selections
Modify
Expand by 4
Copy and paste a paper from the kit as a new layer
Selections
Invert
Delete
Select none
Move paper below your frame
Select the water element
Copy and paste on top of your paper
Crop as needed
Select the sun element
Copy and paste as new layer
Position as desired
Add drop shadow.
Copy the fence element
Resize and paste as new layer
Duplicate
Mirror
Add drop shadow to both.
Copy and paste the palm tree
Position
Duplicate
Mirror
Add drop shadow to each one.
Copy and paste the sand element
Resize if you want
Copy & paste your tube
Add drop shadow
Select a paper from your kit
Paste under all other layers
Apply your mask to this paper.
Merge visible
Crop and resize your tag as you want.
Add your © info and your name/text.
If you aren’t going to animate you’re done.
TO ANIMATE
We’re going to do glitter:
Use your magic wand. Select whatever you want to have glitter.
Adjust-Add noise-
Uniform-Monochrome checked-Noise 35%
-Select none-
Edit-Copy Merged
Paste as new animation in animation shop
-Back to PSP
Repeat the add noise changing your noise setting to 45
-Select none-
Edit copy merged
Paste AFTER current frame in AS
Back to PSP
Repeat again, changing the noise to 55
-Select none-
Copy merged
Paste after current frame in AS
View animation
Save if satisfied
Enjoy your tag!
Friday, June 3, 2011
•Beach Babe-FTU•

For this tutorial, you’ll need a working knowledge of PSP.
I’m using PSP 9 but any version should work.
This tutorial is my own and any resemblance to any other is purely coincidental.
Supplies for this tutorial:
PSP (any version)
Scrap kit of choice.
I’m using the FTU kit: Summer Bliss.
You can get her kits here: http://gothicinspirations.blogspot.com
Tube of choice: I’m using Elias Chatzoudis
This is a tube you MUST have a license to use. Don’t use these tubes without a license!
I got this tube while he was at MPT but you can find these tubes here: http://www.psptubesemporium.com/
Let’s begin!!
Open a new canvas 800x600.
Use your ellipse tool in a brown color to make a circle.
Apply your blind texture effect.
Select the inside of your circle with your magic wand.
Selections-modify-expand by 7
Copy a paper from the kit.
Paste as new layer
Selections-invert-delete
Move paper below your circle.
Now select the elements you want to use in your tag.
I used:
the hanging sign
The seagull
Palm trees
Flowers
Coconuts
& tiki candle
Resize each of these elements to fit your tag.
Place as desired through your tag.
Add a drop shadow to each one.
Add your tube & add the drop shadow to your tube.
Crop your tag down.
Resize and add your copyright info & any text you want on the tag.
Save and enjoy your new tag!
Subscribe to:
Posts
(
Atom
)


