Monday, August 30, 2010
Template: Flower Child

Sunday, August 29, 2010
Tag--Fight Like a Girl
Made this tag with my newest template!
I'm pleased with how it came out!!

Let's see what you can do with it!!..lOl..
Peace & Lots-O-♥
New Template-Fight Like a GIRL!
I love this template. I had fun while I was making it! LOL
Hope that someone out there can use it!
Here is the preview:

You can download this template HERE
If you use this template, please send me your creations to be featured on my blog!
Peace & lots-O-♥
Friday, August 27, 2010
New PTU Tag: I {heart} Elias!
Made another tag with Kelly's awesome kit!
Be sure to check out her blog HERE for info on how to get this & all of her fabulous kits!
Here is the tag I made with it:

Keep checking back here. I will have new templates & tuts SOON!!
New Template: Rocker Chick
Got a new template for ya today.
If you make anything with it or use it for a tutorial, please send me your creations.
I would love to feature them on my blog!
Preview:

If you make anything with it or use it for a tutorial, please send me your creations.
I would love to feature them on my blog!
Preview:

You may download HERE
As always..
Peace & lots-O-♥
Thursday, August 26, 2010
New Template-Elias Rocks
So with the release of Kelly's rockin' kit, I just had to make a template to go with it.
Here is the preview of it:

You can download this template HERE
If you download, be sure to leave me so ♥
Wednesday, August 25, 2010
New PTU Tag-Elias Girls
I couldn't wait! Kelly has this BRAND spankin' new kit
I {heart} Elias..Here is the preview:
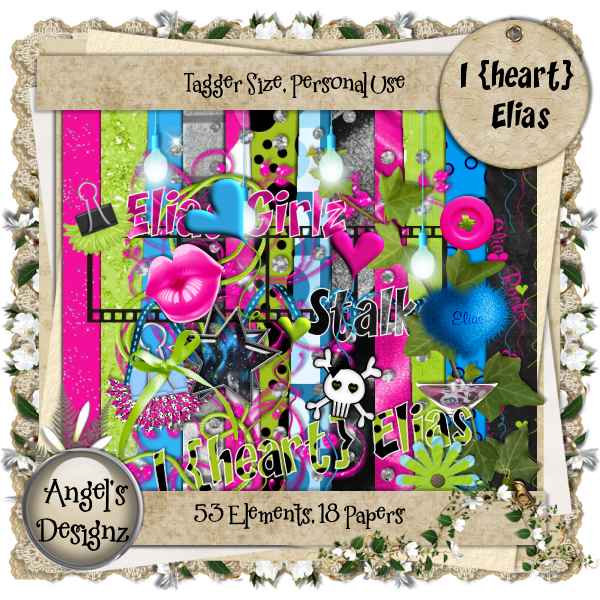
This kit is AMAZING!
I had a freakin' BLAST working with it! I'm sure you will too!
You can find this & all of her other kits and links to her stores HERE.
And now--Check out this tag I made with this fabulous kit:

Be sure to check out Kelly's blog for more info on how to get her kits!
Till next time:
Peace! & Lots-O-♥
Tuesday, August 24, 2010
New PTU Tag~Divalicious
I had a blast working with Kelly's kit
"She's a Diva"
So I made this tg with it.

You can find her blog with all of her AWESOME kits HERE.
She has two awesome new kits that you definately won't want to miss!
So be sure and check her out!
Got some new templates on the way so keep and eye out!
Till then friends,
Peace & lots-O-♥
Monday, August 23, 2010
She's a Diva: PTU Tut

For this tutorial, you’ll need a working knowledge of PSP.
I’m using PSP 9 but any version should work.
This tutorial is my own and any resemblance to any other is purely coincidental.
Supplies for this tutorial:
PSP (any version)
Scrap kit of choice.
I’m using the PTU kit: “She’s a Diva” from Angel’s Designz.
This is an awesome kit! Thanks Kelly!!!
You can get her kits here: http://angelsdesignz.blogspot.com/

Tube of choice: (with a close-up) I’m using the wonderful work of Elias Chatzoudis.
This is a tube you MUST have a license to use. Don’t use his tubes without a license!
You can find them here: http://www.mypsptubes.com/
Open your canvas. I’m starting with 800x600 (you can trim it later)
Use your ellipse tool to make a circle. Foreground black, background null.
Width 10. Center your circle in your canvas.>Convert to raster layer.
Copy & paste your tube where you would like it on top of the circle.
Select your circle layer>duplicate>move this OVER your tube layer
Erase any part of the circle covering your tube that you don’t want covered.
Select your tube layer.> delete any excess tube outside of your circle layer
Add drop shadow to your tube layer. I’m using 2/4/67/8.00
Select your circle layer under your tube
Using the magic wand, click inside the circle. >Add new layer>
Selections>Modify>Expand>2
Copy paper of your choice (I used paper8) Paste INTO selection
Move your paper layer UNDER your circle layer.
Add drop shadow to your circle layer that is under your tube.
Select none.
Copy the close-up of your tube. Select your paper layer>Edit>Paste close-up as new layer.
Mirror your close-up and adjust the size to fit into your circle.>Delete any excess.
Change the blend mode of your tube layer to Luminance Legacy
Add your drop shadow.
Now for your elements:
Copy circular word art. Paste as new layer on top of your tube layer.
Adjust it using the raster deform tool to fit on the circle you made.
Adjust>sharpen.
Duplicate this layer> Move copied word art under your tube layer.
Select your original word art layer>Erase any that covers your tube.
Add drop shadow to the top word art.
Select any other elements you want to add.
Copy>paste> adjust and arrange on your tag as you want them.
I used the pink butterfly.>Resized using raster deform tool>
Adjust>sharpen>Added white outline>added drop shadow.
Silver swirl>copy>paste behind all other layers.
Duplicated this layer. Flipped>Mirrored.
Use your selection tool to crop your tag down.
Now re-size to where you want it.
(Mine is 500x413)
Merge visible>Adjust>Sharpen
Add your copyright info.
Add your name.
Save as .png image for transparent background.
Viola! Finished! Easy enough right!
Hope you enjoyed this tut.
If you made anything, please email me your creations to be featured here on my blog!
Saturday, August 21, 2010
Party Girl Banner
Made a new banner using Kelly's wicked awesome kit
Party Girl.
Please check out her blog HERE
And here is the banner I made with it.

Like I said before, You will LOVE this kit!!
Also would like to say that I will hopefully have a new tutorial up soon.
I'm still pretty new at them so I do them as I can..
I will also be adding some templates very soon as well!!
Keep checking back & be sure to leave me a chatter if ya stop by.
I ♥ hearing from you!
Thursday, August 19, 2010
Misfit Templates!
I participated in the template challenge for Creative Misfits.
Here is the preview of my set:

You can snag mine as well as the other misfits templates HERE
Be sure and leave some ♥ if you download!
Wednesday, August 18, 2010
New PTU Tag: Rockin' Party Girl
Made this tag with Kelly ROCKIN' kit:

You will LOVE working with these bright colors and awesome elements!
Definately one of my fave kits I've worked with!
Here's one of the tags I made from this kit:

Check out Kelly's blog HERE for info about the kit,
including how to purchase it!
:) & ♥
Tuesday, August 17, 2010
New Template!!
Got a new template for you.
Here's the preview:

And here is what I made with it myself:

You may download HERE
Please leave some ♥ or a shout in my chatter if you DL!
Till next time☺& ♥
Sunday, August 15, 2010
New Tag- Fairy Fantasy

Thursday, August 12, 2010
New Template: Jesus Loves you
I've started making templates! (yay!!) You will be seeing the ones I make for the Creative Misfits blog SOON!
Till then, here is one I've done. I am always looking for Christian themed supplies to use and can't remember the last time I saw a christian themed template. So I will be offering these and several others as I come up with them. Here's the preview of the template:

And you may download it HERE
Please leave me a lil love if you DL!
Many thanks and ♥
New Tag! Paparazzi Banner
I realllllllly loved this kit from Kelly over at Angels Designz
So I HAD to make a banner with it. No tut though..lOl..
You can find info on how to get her kits on her blog.
So be sure to check her out!!
Here's the banner I made with the kit, Paparazzi:

Tuesday, August 10, 2010
New Tut: Paparazzi Glam
Made a new tut using Kelly's fabulous kit :Paparazzi.
Here's the preview for her kit:

Check out her blog to see this & al of her other awsome kits!!
Here is the tag I made:

For this tutorial, you’ll need a working knowledge of PSP.
I’m using PSP 9 but any version should work.
This tutorial is my own and any resemblance to any other is purely coincidental.
Supplies for this tutorial:
PSP (any version)
Scrap kit of choice.
I’m using the PTU kit: Paparazzi from Angel’s Designz.
You can get her kits here: http://angelsdesignz.blogspot.com/
Vix Mask 197 You can get it here: http://www.freewebs.com/vixpsp
Tube of choice: I’m using the wonderful work of Keith Garvey.
This is a tube you MUST have a license to use. Don’t use his tubes without a license!
You can find them here: http://www.mypsptubes.com/
On to the tut:
I’m starting with a 900X700 canvas (you can always crop and resize later)
Select your preset shape tool (use rectangle) Make your foreground color BLACK.
And make your background inactive. Line width I used is 10.
Make your rectangle. (right click the rectangle layer>convert to raster layer)
Select your magic wand. Click inside your rectangle.
Selection>modify>Expand by 3 *Do NOT deselect!*
Add new raster layer
Select a paper from your kit. Copy>Paste INTO selection. Select none.
Move this layer (your paper layer) UNDER your frame layer.
Go to Effects>Texture effects>Blinds settings Width 3 & 34% opacity
Select your tube>Copy>Paste on top of your frame layer. Place where you want it.
Select your frame layer>duplicate> Move this layer above your tube layer.
Erase any parts of the frame that are covering your tube that you don’t want to be.
Erase any parts of your tube that are sticking out under your frame that don’t need to be.
Add a drop shadow to your tube. (I used 1>5>47>3)
Duplicate your tube layer.>Mirror>Move this copy of your tube layer
under your frame.>Erase what you need erased.>Change the blend mode to Luminance (legacy)
Select your bottom frame layer>Add a drop shadow to this.
Now for your elements. Use whatever elements you want from your kit.
Resize them and place how you want.
If you’re using this same kit, I resized my purse element 35%
and placed in in the left hand corner.>Add drop shadow.
I used the glitter vine.>Resized 25%>Mirrored
>Moved layer UNDER my purse layer>Added drop shadow.
Ray of light>Copy>paste> mirror> placed under my frame layer>Erase as needed.
Copy a paper>Paste under all other layers> Layers > New Mask Layer>From Image
Merge All Visible layers> Crop how you want>Resize to your desired size.
Adjust>Sharpen
Now add your Copyright Info and your name. Ta-Da! You have your tag!
I hope you enjoyed this tut!!!
Exciting news!!!
I am SOOOO very excited to tell you all that I am now on another creative team!!!
You can find her blog here:
She's got some awsome kits for you to check out.
So whattya waiting for?..lOl..
Monday, August 9, 2010
Another Tag from Evil Purple Kit
So, I really like this kit..lOl..
I made another tag with it.
Here it is:

Again, you can get this kit from Crystal
Saturday, August 7, 2010
New Tag: Evil Purple
Hey everyone!! Hope you all are having an awsome weekend.
I just wanted to share a new tag I made with Crystal's kit:
Evil Purple.
Here is a preview of this cool kit:

You can find her kit at
And go check out her blog here:
And this is the tag I made with it:

You'll love this kit. Lots of purple and black!!
Enjoy the rest of your weekend!!
Sunday, August 1, 2010
New Tag-Rocker Girl
Hey guys. Made a new tag today using Crystal's PTU kit: Rocker girl
Thanks so much for the kit Crystal!
Here's the tag:

You can find this & her other kits here:
Have a fabulous day guys!!!
Subscribe to:
Posts
(
Atom
)


