Monday, November 22, 2010
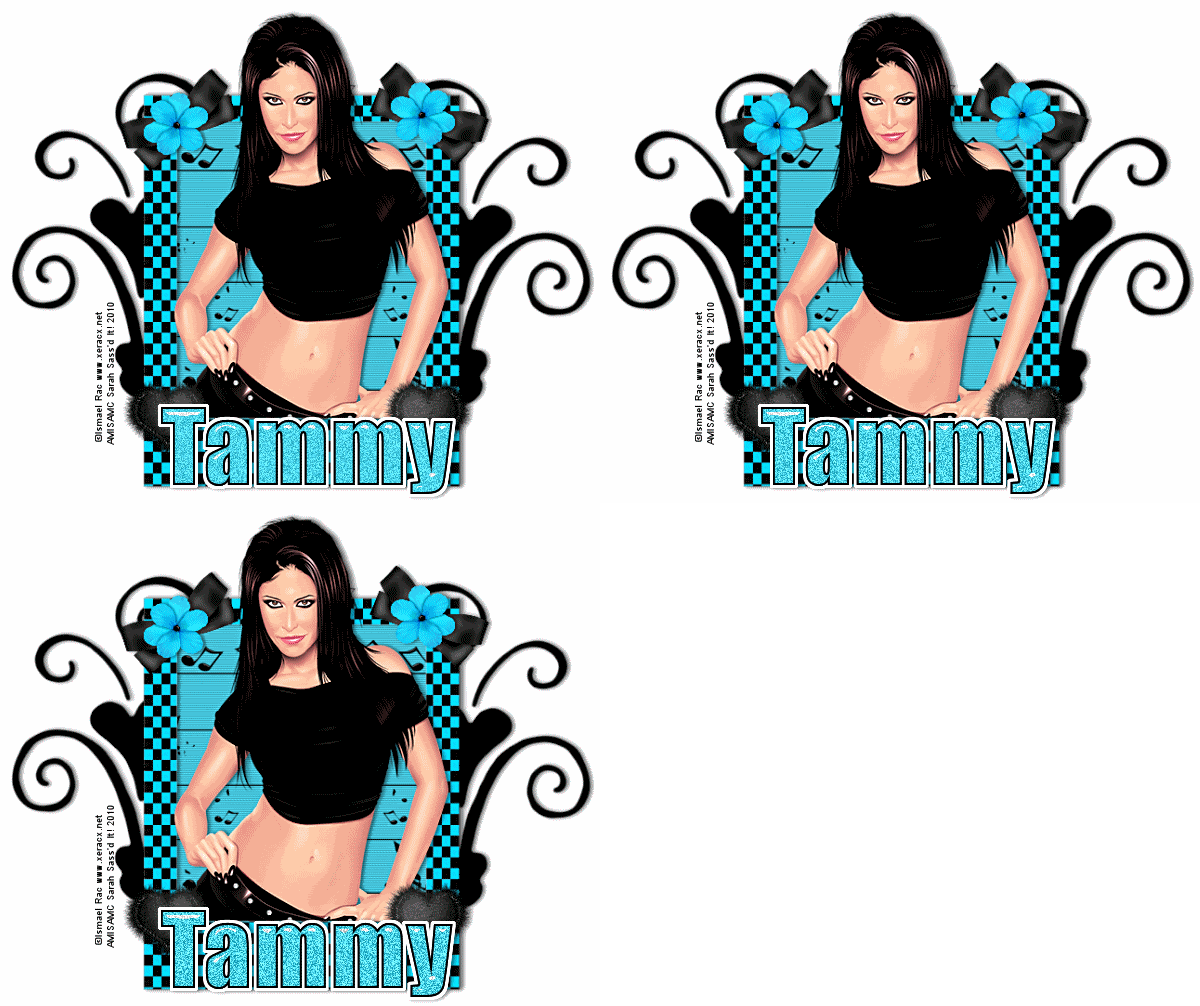
Weeping Heart Tut
4:07 PM
|
Posted by
♥-Sarah-♥
|
For this tutorial, you’ll need a working knowledge of PSP.
I’m using PSP 9 but any version should work.
This tutorial is my own and any resemblance to any other is purely coincidental.
Supplies for this tutorial:
PSP (any version)
Scrap kit of choice.
I’m using the PTU kit: Weeping Heart By Tammy’s Scraps
You can get her kits here: http://www.scrappetizing.com/store/
Be sure to check out her blog: http://tammysscraps.blogspot.com/
Tube of choice. I’m using is by Ismael RAC
But you can find these tubes here: www.xeracx.net
You MUST have a license to use these tubes. Don’t use them without a license!
Let’s begin:
Open a new canvas-800x600 (we crop later)
Select a frame from your kit.
I used the white Polaroid frame.
Copy it & paste into your canvas.
Resize if you need to.
Using your magic wand, select the white part of your frame.
Now select a paper from your kit-copy.
Back to your canvas-Paste INTO selection.
-Select none-
Now copy & paste your tube on top of your frame.
Select your frame layer & duplicate.
Move this layer on top of your tube.
Erase any parts of the frame that are covering your tube’s head and face.
Select your tube layer and erase any parts hanging out under your frame.
Select the bottom frame layer. Click inside the empty area with your magic wand.
Selections-Modify-Expand by 3.
Add new layer and flood fill with a color from your kit.
Move this layer below your frame layer and add the blinds effect with these settings:
Width 2 : Opacity: 18 & color black (horizontal checked)
Now add drop shadow to tube layer and the BOTTOM frame layer.
Select a few elements from your kit.
Copy them and paste into your canvas.
Resize as needed. Position and add drop shadows.
I used the black bow. Pasted it into the left corner of my frame.
Duplicated it and mirrored.
Added my blue flower. Duplicated and mirrored it as well.
Did the same steps for my black fuzzy hearts & my doodles in the background.
I used one of the music elements and pasted under my frame and moved it to the left.
I erased the excess hanging out and duplicated this layer & mirrored it as well.
Crop your tag down and resize as desired.
Add your text and copyright info.
If you’re not going to add animation, then you’re finished.
If you are do the following:
Merge all. Duplicate 2 times. (You will have 3 layers)
Use your magic wand. Select whatever you want to have glitter.
On your first layer:
Adjust-Add noise-
Uniform-Monochrome checked-Noise 35%
Your next layer-everything the same EXCEPT noise is 45%
Third layer-Everything the same EXCEPT noise is 55%
Now save as animation file.
GO over to your animation shop & open it up.
View animation-Save as .gif and you’re done!
I hope you enjoyed this tutorial!
Thanks to anyone that tries it out!
♥
Labels:
PTU Tut
,
Rac Tutorial
Subscribe to:
Post Comments
(
Atom
)
Old Temps
Older templates can be downloaded HERE
Background created by Sarah-Scrap kit by Just So Scrappy. Powered by Blogger.
Lables
- 12 Days of Christmas Freebie ( 12 )
- 4th Of July ( 3 )
- Animated ( 16 )
- award ( 6 )
- baby ( 1 )
- blog train ( 1 )
- Caron Vinson ( 3 )
- Christmas ( 22 )
- city ( 1 )
- country ( 1 )
- CT call ( 1 )
- CT Tags ( 17 )
- CU ( 1 )
- CU Freebie ( 5 )
- Easter ( 2 )
- Elias Chatzoudis ( 28 )
- emo ( 5 )
- Facebook cover ( 1 )
- Fall ( 14 )
- forum set ( 2 )
- Frame ( 2 )
- Freebie ( 25 )
- Frieng Gifts ( 2 )
- FTU ( 6 )
- FTU Kit ( 8 )
- FTU tag ( 3 )
- FTU tag. Garv ( 1 )
- FTU Tube ( 4 )
- FTU Tut ( 30 )
- Garvey ( 10 )
- girly ( 1 )
- Gorjuss ( 11 )
- Halloween ( 7 )
- haloween tut ( 6 )
- holiday ( 1 )
- Joel adams ( 4 )
- Jose Cano ( 7 )
- Josh Howard ( 1 )
- Lady Mishka ( 5 )
- Made w. my kits ( 14 )
- Mask ( 1 )
- native ( 1 )
- Nene Thomas ( 1 )
- new year ( 3 )
- NEWS ( 2 )
- No Tube ( 3 )
- pinuptoons ( 3 )
- PTE ( 1 )
- PTU ( 3 )
- PTU CU ( 2 )
- PTU Kit ( 20 )
- PTU tags ( 58 )
- PTU Tut ( 127 )
- RAC ( 29 )
- Rac Tutorial ( 15 )
- Robert Alvarado ( 1 )
- SALE ( 5 )
- School ( 1 )
- Show Off ( 9 )
- Snags ( 2 )
- Spring ( 4 )
- St. Patrick's Day ( 2 )
- Store collab ( 1 )
- Summer ( 19 )
- Template ( 44 )
- Thanksgiving ( 1 )
- tooshtoosh ( 21 )
- tutorial ( 3 )
- twilight tutorial ( 2 )
- Using my kits ( 1 )
- using my temps ( 8 )
- Valentines ( 8 )
- verymany ( 2 )
- Winter ( 8 )
- Zindy ( 2 )
- zlata ( 1 )
Archive
-
▼
2010
(
93
)
-
▼
November
(
20
)
- -Girly Christmas Tutorial-
- Jingle your bells template
- PTU Tutorial-Blue Blue Christmas
- New tag
- Teen Crush Tut
- Weeping Heart Tut
- New Templates!!!
- PTU TAG
- PTU Fairy Merry Christmas Tag
- RAC Christmas TUT
- PTU Tag-Sexy Snowflakes
- Chickalicious Tut
- PTU Tut-Holiday Wishes
- New PTU Tags
- PTU Tut--Fairy Dreams
- PTU tag-B$&%# Squad
- PTU tag-Cano Christmas
- New Tag-Misfortunate Girl
- PTU-Cherry Bomb
- PTU Tut-Drama Mama
-
▼
November
(
20
)
My TOU
By downloading any of my items, you agree to the following TOU:
All items I provide on this blog are my own creations.
Any resemblance to another product is strictly coincidental.
Please do not share anything I create!
Do not claim as your own. Give credit where it is due!
If you use them for challenges, please link back to my blog.
If you use them in tutorials, please link back to my blog.
If you use any of my creations, I would love to see it!! Feel free to email them to me, anytime & I will display them on my blog!!
Blog: http://sarahstagsthings.blogspot.com/
My Email: Smcmanus44@gmail.com
Thank you!!


0 comments :
Post a Comment