Tuesday, November 30, 2010
-Girly Christmas Tutorial-

For this tutorial, you’ll need a working knowledge of PSP.
I’m using PSP 9 but any version should work.
This tutorial is my own and any resemblance to any other is purely coincidental.
Supplies for this tutorial:
PSP (any version)
Scrap kit of choice.
I’m using the PTU kit: Girly Christmas By Tammy’s Scraps
You can get her kits here: http://www.scrappetizing.com/store/
Be sure to check out her blog: http://tammysscraps.blogspot.com/
Tube of choice. I’m using is by Elias Chatzoudis
But you can find these tubes here: www.mypsptubes.com
You MUST have a license to use these tubes. Don’t use them without a license!
Template by ME-You can find it here on my blog
Let’s begin:
Open the template. Delete the credits layer.
Open one of your papers from your kit-Copy-Now select your back rectangle with your magic wand.
Edit-Paste INTO selection.-Deselect.
Select another paper from your kit-Copy it-
Select the inner rectangle on the left side with your magic wand.
Edit-Paste INTO selection.
Do the same for the other rectangle on the right-But use a different paper from the kit.
Finally, select the inner circle with your magic wand & do the same thing & paste a paper into it.
Select each of the outlines of your papers with your magic wand.
Fill each with a different color from your kit & add noise setting of choice to each.
Copy another paper from your kit-Resize a bit and paste overtop your word art layer.
Select your “BELLS” word art. Select all-Float-Defloat
Make your paper layer you just pasted, active. Selections-Invert-Delete-Select none.
You can recolor the background of the other word art if you want doing the same thing you just did.
Now let’s add the tube.
Select the inner circle & paste your tube as new layer.
Duplicate the outlining circle layer-Move below your tube.
Now select the top outlining circle and erase any parts covering your tube’s face.
Select your tube layer and erase any parts hanging out.
Add a drop shadow to your tube.
Now we add some fun elements!!
I used the the Christmas lights stand on the background rectangle. Then duplicated it & flipped it.
Add drop shadow.
Add your snowman/candy cane to the left rectangle.-Image-Mirror.
Add drop shadow to each.
Add your other elements this way & don’t forget your drop shadows.
Crop and resize.
Add your copyright info and any text you want on it.
Save and enjoy your fabulous new tag!
Jingle your bells template
Made a new template to share with you guys.
Hope you like it!
I'll be using it in my next tutorial!!
Please leave some ♥♥ if you download!
Thanks!!
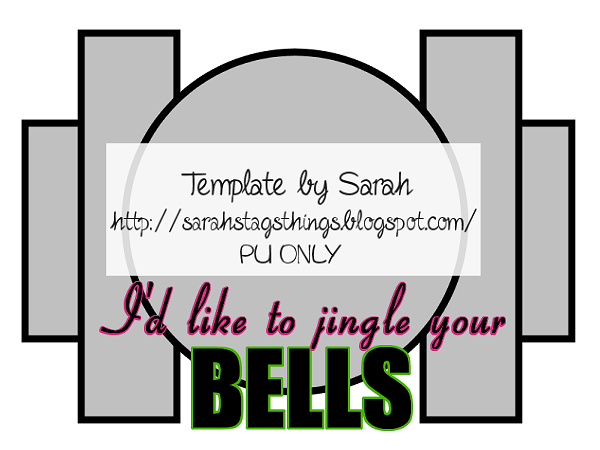
Download HERE
Saturday, November 27, 2010
PTU Tutorial-Blue Blue Christmas

For this tutorial, you’ll need a working knowledge of PSP.
I’m using PSP 9 but any version should work.
This tutorial is my own and any resemblance to any other is purely coincidental.
Supplies for this tutorial:
PSP (any version)
Scrap kit of choice.
I’m using the PTU kit: Blue Christmas by Angel’s Designz.
You can get her kits here: http://angelsdesignz.blogspot.com/
Template 002: http://soelegantlywasted.blogspot.com/search/label/Templates
Tube of choice: I’m using the wonderful work of Ismael Rac.
This is a tube you MUST have a license to use. Don’t use his tubes without a license!
(I got this tube while he was at AMI but you can find them here now: http://xeracx.net/store/
On to the tut!!
Open your template.
Select one of the papers from your kit. Copy it.
Select the dark gray rectangle on your template.
Paste your paper as a new layer and crop around the rectangle so your paper fits into it.
Select your tube.
Copy it & paste into your canvas. Position where you like it and add a drop shadow.
Select the “Merry Christmas” word art
Move it above your tube layer and position at the bottom of your tag.
Select the inner white squares with your magic wand.
Flood fill with a color matching your kit & tube.
Select the close-up of your tube and paste as a new layer.
Crop your tube to fit into the frame.
Change the blend mode to legacy.
Duplicate this layer & mirror it.
Move it down to the bottom square and fit it into the frame.
Erase any excess tube you have hanging out from the frame.
Now select the elements you want to use from your kit.
Copy them and paste into your canvas.
Resize them and add your drop shadow.
Crop your tag down and resize to your liking.
Add your copyright info and your text you want.
Save & enjoy your new tag!
Thanks for doing my tutorial.
Friday, November 26, 2010
New tag
Made this tag with Tammy's awesome kit,
Teen Love.
Check out her blog HERE for info to get awesome kits.
Also check out her fab freebies on her blog--
Be sure to leave her some love if ya download!
Here's the tag I made with her kit:

Teen Crush Tut

For this tutorial, you’ll need a working knowledge of PSP.
I’m using PSP 9 but any version should work.
This tutorial is my own and any resemblance to any other is purely coincidental.
Supplies for this tutorial:
PSP (any version)
Scrap kit of choice.
I’m using the PTU kit: Teen Love By Tammy’s Scraps
You can get her kits here: http://www.scrappetizing.com/store/
Be sure to check out her blog: http://tammysscraps.blogspot.com/
Tube of choice. I’m using is by Elias Chatzoudis
But you can find these tubes here: www.mypsptubes.com
You MUST have a license to use these tubes. Don’t use them without a license!
Template by Juicy Bits-Find her temps here: http://myjuicybits.blogspot.com/
Plugins- Xero Fritillary : http://www.xero-graphics.co.uk/
Let’s begin:
Open your template & remove the copyright layer.
Select your tube. Copy & paste it over the white layer under your Polaroid layer.
Select the Polaroid layer and duplicate it. Move this duplicated layer UNDER your tube.
Recolor both Polaroid layers the same color (choose a color from your kit/tube to match)
On both Polaroid layers add the following Fritillary settings:
Granularity-5 Aggression-30
Tesselation-30 Variation50
Select your top Polaroid layer and erase any parts covering your tube.
Erase any excess tube you have hanging out under your Polaroid frame.
Select a few papers you want to use from your kit-Open them up .
Select the first paper you want to use-Copy it.
Select your background rectangle-Select all-Float-Defloat-Edit-Paste INTO selection.-Select none.
Select your next paper you want to use. Copy it.
Now select your background circle.-Select all-Float-Defloat-Edit-Paste INTO selection.
Do these same steps with your other shapes and paste your papers into them.
Select your inner bracket layer. Recolor to match your tube and kit.
Select the outline of the bracket layer. Recolor a different color to match and add noise (any settings will do)
Recolor the inside square of your Polaroid to match your tube/kit.
Select any other gray areas of your template and recolor them using colors from your kit.
Add a drop shadow to your layers if you wish.
Select a few elements from your kit to add to your tag.
Resize them as needed and position.
Add your drop shadow to each one.
Crop down and resize as desired.
Add your copyright info and your text.
Save and enjoy your new tag!!
Monday, November 22, 2010
Weeping Heart Tut

For this tutorial, you’ll need a working knowledge of PSP.
I’m using PSP 9 but any version should work.
This tutorial is my own and any resemblance to any other is purely coincidental.
Supplies for this tutorial:
PSP (any version)
Scrap kit of choice.
I’m using the PTU kit: Weeping Heart By Tammy’s Scraps
You can get her kits here: http://www.scrappetizing.com/store/
Be sure to check out her blog: http://tammysscraps.blogspot.com/
Tube of choice. I’m using is by Ismael RAC
But you can find these tubes here: www.xeracx.net
You MUST have a license to use these tubes. Don’t use them without a license!
Let’s begin:
Open a new canvas-800x600 (we crop later)
Select a frame from your kit.
I used the white Polaroid frame.
Copy it & paste into your canvas.
Resize if you need to.
Using your magic wand, select the white part of your frame.
Now select a paper from your kit-copy.
Back to your canvas-Paste INTO selection.
-Select none-
Now copy & paste your tube on top of your frame.
Select your frame layer & duplicate.
Move this layer on top of your tube.
Erase any parts of the frame that are covering your tube’s head and face.
Select your tube layer and erase any parts hanging out under your frame.
Select the bottom frame layer. Click inside the empty area with your magic wand.
Selections-Modify-Expand by 3.
Add new layer and flood fill with a color from your kit.
Move this layer below your frame layer and add the blinds effect with these settings:
Width 2 : Opacity: 18 & color black (horizontal checked)
Now add drop shadow to tube layer and the BOTTOM frame layer.
Select a few elements from your kit.
Copy them and paste into your canvas.
Resize as needed. Position and add drop shadows.
I used the black bow. Pasted it into the left corner of my frame.
Duplicated it and mirrored.
Added my blue flower. Duplicated and mirrored it as well.
Did the same steps for my black fuzzy hearts & my doodles in the background.
I used one of the music elements and pasted under my frame and moved it to the left.
I erased the excess hanging out and duplicated this layer & mirrored it as well.
Crop your tag down and resize as desired.
Add your text and copyright info.
If you’re not going to add animation, then you’re finished.
If you are do the following:
Merge all. Duplicate 2 times. (You will have 3 layers)
Use your magic wand. Select whatever you want to have glitter.
On your first layer:
Adjust-Add noise-
Uniform-Monochrome checked-Noise 35%
Your next layer-everything the same EXCEPT noise is 45%
Third layer-Everything the same EXCEPT noise is 55%
Now save as animation file.
GO over to your animation shop & open it up.
View animation-Save as .gif and you’re done!
I hope you enjoyed this tutorial!
Thanks to anyone that tries it out!
♥
Sunday, November 21, 2010
New Templates!!!


PTU TAG
I used Tammy's Weeping Heart kit to make this tag.
I will have another tag/tut with this kit soon.
To get this fabby kit and Tammy's other kids, check out her blog HERE
Awesome kit Tammy!!
Here's the tag I made with it:

Saturday, November 20, 2010
PTU Fairy Merry Christmas Tag
I made this tag with Kelly's new kit-Blue Christmas.
You can find this kit HERE
I used the wonder work of Joel Adams.
If you like these tubes, you better act fast bc Dec. 1--CILM is closing!! *tears*
K--here's my taggie

RAC Christmas TUT

For this tutorial, you’ll need a working knowledge of PSP.
I’m using PSP 9 but any version should work.
This tutorial is my own and any resemblance to any other is purely coincidental.
Supplies for this tutorial:
PSP (any version)
Scrap kit of choice.
I’m using the PTU kit: Penguin Xmas by Angel’s Designz.
You can get her kits here: http://angelsdesignz.blogspot.com/
Tube of choice: I’m using the wonderful work of Ismael Rac.
This is a tube you MUST have a license to use. Don’t use his tubes without a license!
You can find them here: http://xeracx.net/store/
Xmas templat 1 by Rachel. Find this temp here: http://scrapsofenchantment.blogspot.com/
On to the tut!!
Open your template. Delete the SNOW text (we won’t be using this part of the temp.)
Select the background rectangle with your magic wand.
Select a paper from your kit-Copy-Paste into selection.
I used the blue paper with the snowflakes. Select none.
Select the outline of your background rectangle with your magic wand.
Flood fill with a color from your kit. Adjust-Add noise- Uniform-75%.
Select the inner circle layer. Flood fill with a color from your kit. (mine is green)
Select the outer circle layer. Flood fill with a color from your kit. Add noise.
Now elect any elements you want to add from your kit. Copy and paste them into your canvas.
Resize as needed. Be sure to add a drop shadow to each one.
Select your tube. Paste as desired. Add drop shadow.
Select the close up of your tube. Paste as new layer over your circle layer.
Crop any extra tube you have hanging out of the circle.
Add your drop shadow to the close up.
Select the snowflakes in the kit, Copy and paste into your canvas behind all the other layers.
Add a drop shadow to this layer.
Crop your tag down and resize.
Add your text and your copyright info.
Save & enjoy your new tag!
Thanks for doing my tut, I hope you enjoyed it!
♥♥♥♥
Tuesday, November 16, 2010
PTU Tag-Sexy Snowflakes

Made this tag with Kelly's FABULOUS kit
"Penguin Christmas"
I ♥♥♥♥♥♥♥ this kit!!!!
Thanks so much Kelly!
*smooches*
Check out her blog HERE to get this and her other AWESOME kits!
-I have another tag I did with this kit-
I am writing a tut for it so look for it soon!!
Thursday, November 11, 2010
Chickalicious Tut

For this tutorial, you’ll need a working knowledge of PSP.
I’m using PSP 9 but any version should work.
This tutorial is my own and any resemblance to any other is purely coincidental.
Supplies for this tutorial:
PSP (any version)
Scrap kit of choice.
I’m using the PTU kit: Chickalicious By Tammy’s Scraps
You can get her kits here: http://www.scrappetizing.com/store/
Be sure to check out her blog: http://tammysscraps.blogspot.com/
Tube of choice. I’m using is by Jose Cano
But you can find these tubes here: www.mypsptubes.com
You MUST have a license to use these tubes. Don’t use them without a license!
Let’s begin:
Open a new canvas-800x600 (we crop later)
Open up frame of choice. Copy & paste into your canvas. Resize as needed.
(I use my raster deform tool so I can’t give you my exact %)
Select a paper from your kit. Copy.
Use your magic wand to click inside your frame layer.
Selections-Modify-Expand by 5-Add new raster layer-Do NOT deselect.
Edit-Paste into selection. Select none. Move your paper layer below your frame layer.
Now copy and paste your tube on top of your frame layer. Add drop shadow.
Select any elements from your kit that you want to use.
Copy and paste them. Resize if needed. Position where desired. Add drop shadow.
Select a doodle from your kit. Copy and paste behind your frame and paper layers.
Rotate to a position you like. Add drop shadow.
Select the scattered beads from the kit. Copy and paste behind your doodle layer.
Position. Then duplicate and mirror-Then flip.
Add drop shadow to both of these bead layers.
Now crop your tag down.
Resize to your liking.
Add your copyright info and your name/text.
Save & enjoy your new tag!
Thanks for doing my tutorial!
XoXo
Tuesday, November 9, 2010
PTU Tut-Holiday Wishes

For this tutorial, you’ll need a working knowledge of PSP.
I’m using PSP 9 but any version should work.
This tutorial is my own and any resemblance to any other is purely coincidental.
Supplies for this tutorial:
PSP (any version)
Scrap kit of choice.
I’m using the PTU kit: Holiday Wishes by Angel’s Designz.
You can get her kits here: http://angelsdesignz.blogspot.com/
Tube of choice: I’m using the wonderful work of Ismael Rac.
This is a tube you MUST have a license to use. Don’t use his tubes without a license!
You can find them here: http://xeracx.net/store/
On to the tut!!
Open a new canvas--I go bigger with 800x600 (you can always crop later)
Use your rectangle tool and draw out a rectangle with the width about 14.
Make the foreground black and background null.
Convert to raster layer. Use your magic wand to select the black part of your rectangle.
Select a paper from your kit, copy.
Back to your canvas and paste INTO selection. Deselect.
Now select any elements from the kit that you want to use.
Copy them and place into your canvas.
Resize them as needed. (I use my raster deform tool so I can’t give you exact %)
Be sure to add your drop shadow to each element to give your tag depth.
Now select your rectangle layer. Click inside the empty part with your magic wand.
Selections-Modify-Expand by 4. Add new Raster layer Do NOT deselect.
Copy a paper from the kit. Paste INTO selection in your canvas. Select none.
Move this paper layer under your frame layer.
Now add your tube. Adjust your elements so your tube’s legs are covered.
Erase any parts of your tube hanging out under your frame.
Add a drop shadow.
Add a drop shadow to your frame.
Crop and resize as needed.
Add your Name and copyright info.
Merge all to animate.
Use your magic wand to select what you want to glitter.
Duplicate 2 times. (You will have 3 layers)
Use your magic wand. Select whatever you want to have glitter.
On your first layer:
Adjust-Add noise-
Uniform-Monochrome checked-Noise 35%
Your next layer-everything the same EXCEPT noise is 45%
Third layer-Everything the same EXCEPT noise is 55%
Now save as animation file.
GO over to your animation shop & open it up.
View animation-Save as .gif and you’re done!
Thanks for trying my tut!
New PTU Tags
I made both of these tags using Tammy's kits.
This one is using her Cherry Bomb kit..
I love this tag & this kit is AWESOME!

This next tag is from Tammy's Fairy Dreams kit, another very cute kit!

Check out Tammy's blog HERE for her cute kits and posers too!
PTU Tut--Fairy Dreams

For this tutorial, you’ll need a working knowledge of PSP.
I’m using PSP 9 but any version should work.
This tutorial is my own and any resemblance to any other is purely coincidental.
Supplies for this tutorial:
PSP (any version)
Scrap kit of choice.
I’m using the PTU kit: Fairy Dreams
You can get her kits here: http://www.scrappetizing.com/store/
Be sure to check out her blog: http://tammysscraps.blogspot.com/
Tube of choice: I’m using an adorable poser from the kit.
Weescottlass Mask 302 here: http://weescotslasscreations.blogspot.com/
This one is going to be short and simple. Lets begin.
Open a new canvas. 800x600-we can resize later.
Choose a grass element from your kit. Copy and paste into your canvas.
Choose a tree from your kit. Copy and pate into your canvas. Add drop shadow.
Duplicate your grass and move it so it looks like it’s behind your tree.
Copy and paste the well element into your canvas. Resize and position in your canvas.
Add your drop shadow to it.
Choose one of the cute posers from your kit.
Copy it and paste into your canvas. Resize if needed and add drop shadow.
Select one of the wheat elements. Copy & paste into your canvas.
Resize and duplicate-Mirror. Add drop shadow to both wheat layers.
Select a butterfly from your kit. Copy & paste into your Canvas.
Resize and add drop shadow.
Copy one of the sunbursts from your kit. I’m using burst 4.
Paste into your canvas.
Select a paper from your kit. (Blue for the background) Copy and paste it behind all other elements.
Select your mask. And add new mask layer to your paper.
Make sure your sunburst is on top of your paper layer.
Now crop your tag and resize as needed
Add your Copyright info and any other text your need.
Merge all to add your glitter.
Duplicate 2 times. (You will have 3 layers)
Use your magic wand. Select whatever you want to have glitter.
On your first layer:
Adjust-Add noise-
Uniform-Monochrome checked-Noise 35%
Your next layer-everything the same EXCEPT noise is 45%
Third layer-Everything the same EXCEPT noise is 55%
Now save as animation file.
GO over to your animation shop & open it up.
View animation-Save as .gif and you’re done!
Thanks for trying my tut!
Sunday, November 7, 2010
PTU tag-B$&%# Squad
Just finished this tag using Kelly's newest kit "Bitch Squad".
It's part of a collab she did that is exclusive to DigiFoxsStudio.
Check out her blog HERE to get this and her other awesome kits.
Here is the tag I made with this wicked awesome kit:

Thanks for looking and don't forget to check Kelly out!!
Friday, November 5, 2010
PTU tag-Cano Christmas
Made a new tag with one of Kelly's Christmas kits-Happy Holidays.
Very cute kit!!
Check out her blog HERE to get this & all of her fabby kits!!
Here's the tag I made:

Keep checking back as I will be adding NEW tuts soon!!!
Tuesday, November 2, 2010
New Tag-Misfortunate Girl

I made this tag with Kelly's newest kits "misfortunate Girl"
This kit is a dark, goth-y type kit.
Not ussually my style but it was fun to go outside the box and try something new!!
You're sure to love this kit so check out her blog HERE
Monday, November 1, 2010
PTU-Cherry Bomb

For this tutorial, you’ll need a working knowledge of PSP.
I’m using PSP 9 but any version should work.
This tutorial is my own and any resemblance to any other is purely coincidental.
Supplies for this tutorial:
PSP (any version)
Scrap kit of choice.
I’m using the PTU kit: Cherry Bomb By Tammy’s Scraps
You can get her kits here: http://www.scrappetizing.com/store/
Be sure to check out her blog: http://tammysscraps.blogspot.com/
Tube of choice. I’m using is by ©Elias Chatzoudis
But you can now find his work at www.mypsptubes.com
You MUST have a license to use his work. Don’t use his tubes without a license!
Mask 259 here: http://www.weescotslasscreations.blogspot.com/
Let’s begin:
Open a new canvas--I use 800x600 & crop when I’m finished.
Use your ellipse tool, draw out a circle, foreground black background null.
Convert to raster layer.
Use your magic wand to select the colored part of your circle.
Copy a paper from your kit. Paste into selection-Deselect.
Paste in your tube. Duplicate your circle layer and move one layer over the tube and one under.
On the top layer-erase any parts of the circle covering the tube that you don’t want covered.
Add drop shadow to your tube.
Select the inside of your bottom circle layer. Selections-modify-expand by 4.
Copy a paper from your kit-Add new raster layer and paste into selection.
Move this paper under your circle layer.
Add drop shadow to your bottom frame layer.
Select any elements you want to use from your kit.
Copy & paste them into your canvas, resize as needed & add drop shadows.
Add a paper as the background for your tag.
Add new mask layer.
Crop image down to your preferred size.
Add copyright info and any text.
Merge all. If you want glitter do the following:
Duplicate 2 times. (You will have 3 layers)
Use your magic wand. Select whatever you want to have glitter.
On your first layer:
Adjust-Add noise-
Uniform-Monochrome checked-Noise 35%
Your next layer-everything the same EXCEPT noise is 45%
Third layer-Everything the same EXCEPT noise is 55%
Now save as animation file.
GO over to your animation shop & open it up.
View animation-Save as .gif and you’re done!
Thanks for trying my tut!
PTU Tut-Drama Mama

For this tutorial, you’ll need a working knowledge of PSP.
I’m using PSP 9 but any version should work.
This tutorial is my own and any resemblance to any other is purely coincidental.
Supplies for this tutorial:
PSP (any version)
Scrap kit of choice.
I’m using the PTU kit: Drama Mamma from Angel’s Designz.
You can get her kits here: http://www.angelsdesignz.blogspot.com/
Tube of choice: I’m using the awesome work of ©Elias Chatzoudis
You can find these tubes here: www.mypsptubes.com
Xero-Fritillary here: http://www.xero-graphics.co.uk/
Let’s begin!
Open a new canvas-I use 800x600 & resize when I’m done.
Use your rectangle tool to draw out a rectangle in your canvas.
Convert to raster layer.
Use your Xero filter-Fritillary with these settings:
Granularity-5
Aggression-30
Tesselation- 80
Variation- 100
Hit ok.
Position your tube where you want it & add a drop shadow.
Now select a few elements from your kit and add them to your tag.
Make sure to add your drop shadow for each element.
Select inside your frame -Selections-modify-expand by 3
Add new raster layer & flood fill with a color from your kit.
Move this layer below your frame layer.
Duplicate your tube layer. Move below your frame. Erase anything extended beyond your frame.
Change the blend mode to luminance.
Duplicate this layer and mirror.
Add a drop shadow to all layers (if you haven’t already) including your tube and frame layers.
Now crop and resize your tag.
Add your copyright info and any other text.
Save & enjoy your new tag!
Subscribe to:
Comments
(
Atom
)


