Thursday, June 28, 2012
New PTU kit- Only $1.00!!!
11:19 PM
|
Posted by
♥-Sarah-♥
|
Labels:
country
,
PTU Kit
,
Summer
|
0
comments
Wednesday, June 27, 2012
New PTU kits & 2 tuts!!
11:19 AM
|
Posted by
♥-Sarah-♥
|
I'm back from my little vacation and I'm so excited to announce the release of 2 more PTU kits at PTE!!!
Here are their previews.
Be sure to head over to PSPTUBESEMPORIUM to purchase them today!!!
& check out this absolutely GORGEOUS tag/tut
from leather & lace using my 'All my relations' kit::
((Click tag to go to tut))
-Beautiful tag!! Thanks so much!!-
&& here is another tut using my other kit
'Hello Luva'
from Lithium

-Freakin fab tag!!-
Labels:
city
,
girly
,
native
,
PTU Kit
|
0
comments
Saturday, June 16, 2012
Tut w/ my kit!
9:24 PM
|
Posted by
♥-Sarah-♥
|
Another one of my wonderful friends has used my "Happy 4th" kit to make a fabulous tag & tut!!!
Thanks so much Amy for using my kit and makin such a fab tag!!
Click the tag to get the tut!
***Remember to visit PTE to purchase the kit!!***
Labels:
4th Of July
,
Made w. my kits
,
PTU
|
0
comments
Thursday, June 14, 2012
Tut w/ my kit!!
8:03 PM
|
Posted by
♥-Sarah-♥
|
The awesome Leah has made a fabulous tag/tut with my 4th of July kit!!
Check out this beauty!!
Click it to go to the tut!
Labels:
4th Of July
,
Using my kits
|
0
comments
Wednesday, June 13, 2012
Speak for the trees-PTU
3:15 PM
|
Posted by
♥-Sarah-♥
|
For this tutorial, you’ll need a working knowledge of PSP.
I’m using PSP X4 but any version should work.
This tutorial is my own and any resemblance to any other is purely coincidental.
Supplies for this tutorial:
PSP (any version)
Tube/Image is included in the kit.
PTU Scrap kit-Speak for the Trees here: http://sinfullycreativescraps.blogspot.com/
Firefly Animation: http://jusgraphix.blogspot.com/
Animation shop
::Let’s begin::
-Banner-
Open new image 500*175
Select all
Copy and paste a paper from the kit
Position
Selections
Invert
Delete
Select none.
Copy and paste any of the other adorable elements you want to include in your banner.
I used the following:
Clouds (x2)
Hill (x2)
Purple tree (x2)
Orange tree (x2)
Pink tree (x2)
Yellow tree (x2)
Flowers
Butterfly
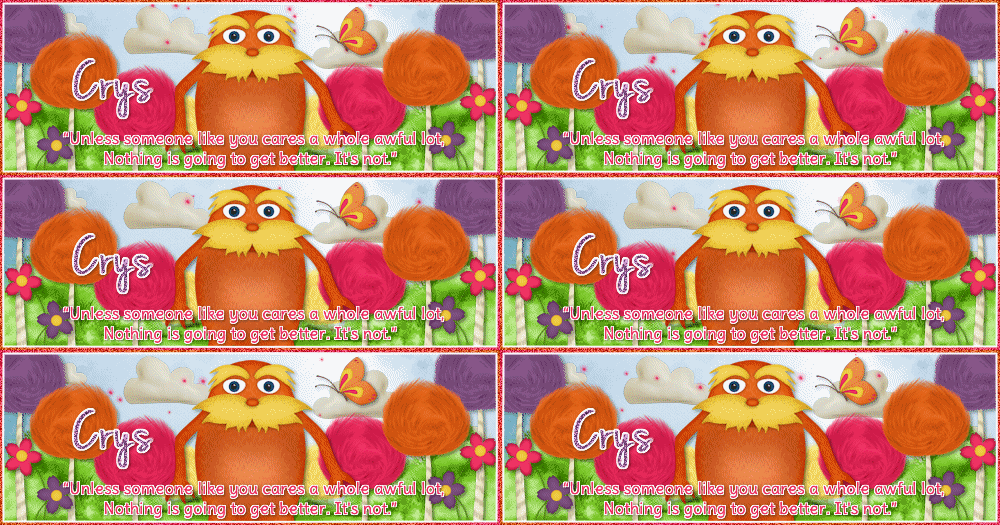
Mr.Lorax J
Copy
Paste
Resize
Position
Add drop shadow to each element
Add new raster layer
Select all
Selections
Modify
Selection borders
Width 2
flood fill w/ gradient to match your tag
Select none
Add noise setting of choice
Select inside your border you just made w/ your magic wand
Selections
Modify
Selection borders
Width 1
Add new raster layer
flood fill white
Select none
Move below your outer border
Now you add your name/text/© info
If you’re not going to animate, save & your done.
::To animate::
Close of your background layer
Right click one of the other layer
Merge>Visible
Copy that top layer
::In AS::
Paste as new animation
::in PSP::
Unhide your background layer and copy it
::in AS::
Paste background as new animation
Open up your animation
(I recolored mine to match my tag)
See how many frames it has and duplicate your top layer and your background you just pasted into AS to that many frames.
This particular animation had 65 frames
Once everything is 65 frames
Select all frames of your animation
Copy
Go to your background layer
Select all frames
Right click in the first frame
Paste>INTO selected frame(s)
Position and click to paste
Go to your top layer of your tag
Select all frames
Copy
Back to where you just pasted your animation
Select all frames
In the first frame, again right click
Paste>INTO selected frame(s)
Position carefully
Click
View animation
If you’re happy, save it!
Enjoy your new banner!
Labels:
PTU Tut
|
0
comments
Tuesday, June 12, 2012
New look!!!
6:25 PM
|
Posted by
♥-Sarah-♥
|
Wanted to give a great big huge THANK YOU to my friend Leah over at
for my awesome new look!!
She's so great!!!!!!
Thanks for your awesome work & hookin' me up Leah!!
♥♥♥♥
First PTU kit!!!!!
11:33 AM
|
Posted by
♥-Sarah-♥
|
I am soo excited to announce the release of my first PTU kit over at
PspTubesEmporium!
Click the picture to go to PTE now!!
Labels:
PTE
,
PTU Kit
|
0
comments
Sunday, June 10, 2012
Unicorn Dreams-PTU
8:28 PM
|
Posted by
♥-Sarah-♥
|
((Click for clear view))
For this tutorial, you’ll need a working knowledge of PSP.
I’m using PSP X4 but any version should work.
This tutorial is my own and any resemblance to any other is purely coincidental.
Supplies for this tutorial:
PSP (any version)
Tube/Image is included in the kit.
PTU Scrap kit-UNBELIVABLE here: http://sweetcravingsscraps.blogspot.com/
Mask of choice
Open new image 800x600
Copy and paste your frame of choice from the kit
Select inside the frame w/ your magic wand
Selections
Modify
Expand by 4
Copy and paste a paper of choice
Selections
Invert
Delete
Select none
Move below your frame.
Now you just start adding the elements you want to include in your tag.
This kit is full of SUPER cute elements!!
I used the following::
Fairy/birds on branch
Clear bubbles
Blue tree
Purple mushroom
Blue mushroom
Grass element
Leaves on vine
Unicorn
Sparkles
Copy
Paste
Resize
Position
Add drop shadow to each element.
Merge visible
Copy and paste paper of choice
Apply your mask.
I did this twice w/ two different papers to get the layered (purple & blue) mask in my background
Once you’re satisfied,
Crop your tags down
Resize
Add any © you need to
Add your name
Save!
Labels:
No Tube
,
PTU Tut
|
0
comments
Friday, June 8, 2012
Gnome sweet Gnome
3:39 PM
|
Posted by
♥-Sarah-♥
|
For this tutorial, you’ll need a working knowledge of PSP.
I’m using PSP X4 but any version should work.
This tutorial is my own and any resemblance to any other is purely coincidental.
Supplies for this tutorial:
PSP (any version)
Scrap kit of choice.
I’m using the PTU kit: ‘Gnome sweet gnome’
You can get her kits here: http://psptubesemporium.com/gimptastic-scraps/
Tube by Pinuptoons
You *MUST* have a license to use this tube!
Find them here now: www.cdoestore.com
Mask of choice
::Let’s begin::
Open new image 800*600
Copy and paste paper of choice
Apply your mask to this layer
Merge group
Copy and paste frame of choice
Resize if you need to
Click inside frame w/ your magic wand
Selections
Modify
Expand by 4
Add new raster layer
flood fill w/ color of choice
Move below your frame layer
Copy and paste the cloud element
Duplicate
Mirror
Ontop of your frame, copy and paste all other elements you want to include in your tag.
I used the following:
Windmill
Gnome
Yellow flower
White flower
Snail
Welcome sign
Leaves
Copy, paste, resize, & position each element you use.
Add drop shadow to each.
Copy and paste your tube
Add drop shadow
Crop your tag and resize as needed
Add your © info and your name
Save and enjoy!
Labels:
PTU Tut
,
Summer
|
0
comments
Wednesday, June 6, 2012
Fabulous & Flirty-FTU
12:45 PM
|
Posted by
♥-Sarah-♥
|
((CLICK FOR CLEAR VIEW))
For this tutorial, you’ll need a working knowledge of PSP.
I’m using PSP X4 but any version should work.
This tutorial is my own and any resemblance to any other is purely coincidental.
Supplies for this tutorial:
PSP (any version)
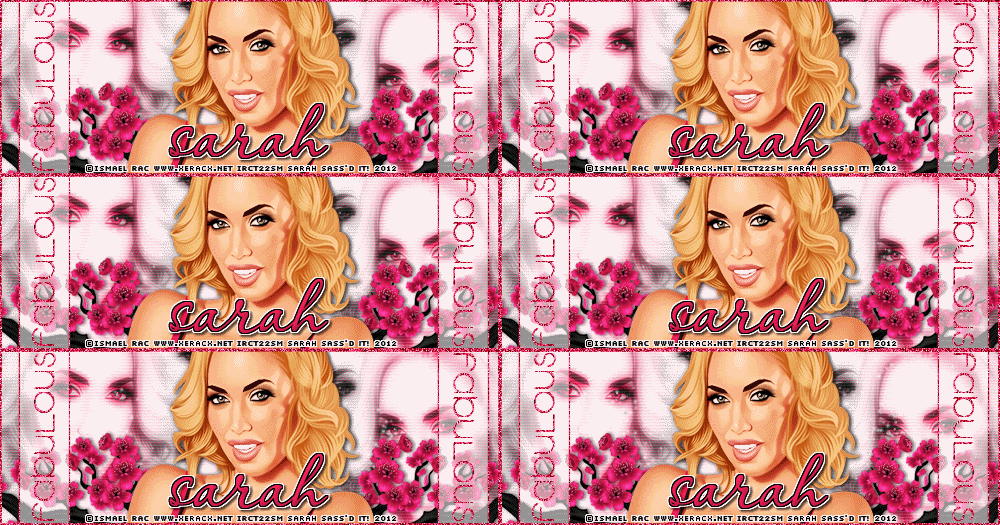
Tube by Ismael Rac.
You *MUST* have a license to use this tube!
Find them here: www.xeracx.net/store
Animation here: HERE
Xero-Soft Vignette
Xero-Radiance
Any elements you want to use
(mine come from a FTU kit called Flirty from Kittz. You can find it HERE: http://kittzkreationz.blogspot.com/ )
AS(animation shop)
::Let’s begin::
Open new canvas 500*175
flood fill white
Add new layer
flood fill with a color to match your tube
Apply Xero-Soft Vignette with these settings:
Shape-horizontal
Sharp-checked
Effect type-foreground color
Pattern type-Diagonal mesh
Repeats-15
Width-62
Height- -33
Strength-85
Copy and paste the close up of your tube
Duplicate 3-4 times and place abut your canvas.
Change blend mode to luminance legacy
Apply Xero radiance (default settings)
Copy and paste any elements you want to include in your tag.
I used these awesome flower branches from a kit from KittzKreationz
Add drop shadow to whatever elements you add.
Copy and paste your tube
Add drop shadow
Now you can add your white rectangles by using your rectangle tool
Draw out your rectangle.
Convert to raster layer
Change the opacity to about 50 (play with it to see what works best for you)
Selections
Select all
Selections
Modify
Selection borders
-both sides
-width1
Add new raster layer
flood fill w/ color to match your tube
Add noise of choice
Select none
Merge down to your white rectangle.
Duplicate
Mirror
Add your word art
Add noise to it if you’d like
Add new raster layer
Select all
Selecions
Modify
Selection borders
Same settings as before
flood fill w/ same color
Add same noise setting
Add your name and © info.
--if you’re not going to animate, save here & you’re done.--
::TO ANIMATE::
Close off your white background layer, your layer your color was on that you applied the vignette effect to, & your close-up layer of your tube(s).
Merge visible
Unhide those other layers and merge them together.
You should now have two layers
Copy your first layer
Paste as new animation in AS
Back to PSP
Copy the second layer
Paste as new animation in AS
::In AS::
Open your animation
Resize it if you need to.
See how many frames it is & duplicate both your background layer of your tag and your top layer of your tag to that many frames.
This animation I’m using has 20 frames.
Select all the frames of your animation
-COPY-
Select all the frames of your background
Right click in the first one
-PASTE INTO SELECTED FRAME-
Place your animation
I did this twice--one on each side of my tube.
Select all frames of your top layer
Right click
Copy
Back to your background layer where you just placed the animation
Select all frames again
Right click in the first frame
-PASTE INTO SELECTED FRAME-
Position your top layer and click to paste.
View animation
If you’re happy w/ it save. Enjoy your new banner!
Labels:
Animated
,
FTU Tut
|
0
comments
Tuesday, June 5, 2012
Breezy Babe-PTU
12:54 PM
|
Posted by
♥-Sarah-♥
|
(click for clear view)
For this tutorial, you’ll need a working knowledge of PSP.
I’m using PSP X4 but any version should work.
This tutorial is my own and any resemblance to any other is purely coincidental.
Supplies for this tutorial:
PSP (any version)
Tube/Image by Elias Chatzoudis
You MUST have a license to use this tube. Do NOT use this tube w/o the proper license!
These images are now available here: www.psptubesemporium.com
PTU Scrap kit-Summer Breeze here: www.tashasplayground.blogspot.com
Xero-Radiance
Mask of choice
Open new image 800*600
Copy and paste frame if choice.
I’m using the ship wheel as my frame.
Resize it if you need to. About 80% is what I did.
Elect inside of the wheel w/ your magic wand
Selections
Modify
Expand by 4
Copy and paste a paper of choice from the kit
Selections
Invert
Delete
Select none
Move below frame.
Add drop shadow to your frame
Now with your paper layer active
Selections
Select all
Copy and paste your close up
Position
Selections
Invert
Delete
Select none
Add drop shadow
Apply Xero radiance (if you want) with the default settings.
Change blend mode to luminance legacy
Copy and paste your water splash element next
Resize
Position
Erase any part of it hanging beyond your frame.
Now the fun part J
Copy and paste all the elements you want to include in your tag.
This kit is FULL of fabulous elements to use!!!
Change it up and make this tag your own!!
::I used::
Sandcastle
Coconut (x2)
Lime slices(x2)
Limes (x2)
Blue flower (x2)
Vine w/ leaves
& drink
Once you’re happy w/ all of your elements
Add drop shadow to each one
Copy and paste your full tube
Add drop shadow
Merge visible.
Copy and paste another paper of your choice from the kit.
Move below the rest of the tag.
Apply your mask to this layer.
Crop down
Resize
Add your © and your name
Save & enjoy your new tag!
Labels:
Elias Chatzoudis
,
PTU Tut
,
Summer
|
0
comments
Monday, June 4, 2012
FTU Mini-Kit-Summer Fun
3:45 PM
|
Posted by
♥-Sarah-♥
|
Made a mini kit for all of my awesome blog followers!
Nothing big or fancy..Hope you can find something to do w/ it!!
Click image for download!
Labels:
Freebie
,
FTU Kit
|
13
comments
Subscribe to:
Posts
(
Atom
)
Old Temps
Older templates can be downloaded HERE
Background created by Sarah-Scrap kit by Just So Scrappy. Powered by Blogger.
Lables
- 12 Days of Christmas Freebie ( 12 )
- 4th Of July ( 3 )
- Animated ( 16 )
- award ( 6 )
- baby ( 1 )
- blog train ( 1 )
- Caron Vinson ( 3 )
- Christmas ( 22 )
- city ( 1 )
- country ( 1 )
- CT call ( 1 )
- CT Tags ( 17 )
- CU ( 1 )
- CU Freebie ( 5 )
- Easter ( 2 )
- Elias Chatzoudis ( 28 )
- emo ( 5 )
- Facebook cover ( 1 )
- Fall ( 14 )
- forum set ( 2 )
- Frame ( 2 )
- Freebie ( 25 )
- Frieng Gifts ( 2 )
- FTU ( 6 )
- FTU Kit ( 8 )
- FTU tag ( 3 )
- FTU tag. Garv ( 1 )
- FTU Tube ( 4 )
- FTU Tut ( 30 )
- Garvey ( 10 )
- girly ( 1 )
- Gorjuss ( 11 )
- Halloween ( 7 )
- haloween tut ( 6 )
- holiday ( 1 )
- Joel adams ( 4 )
- Jose Cano ( 7 )
- Josh Howard ( 1 )
- Lady Mishka ( 5 )
- Made w. my kits ( 14 )
- Mask ( 1 )
- native ( 1 )
- Nene Thomas ( 1 )
- new year ( 3 )
- NEWS ( 2 )
- No Tube ( 3 )
- pinuptoons ( 3 )
- PTE ( 1 )
- PTU ( 3 )
- PTU CU ( 2 )
- PTU Kit ( 20 )
- PTU tags ( 58 )
- PTU Tut ( 127 )
- RAC ( 29 )
- Rac Tutorial ( 15 )
- Robert Alvarado ( 1 )
- SALE ( 5 )
- School ( 1 )
- Show Off ( 9 )
- Snags ( 2 )
- Spring ( 4 )
- St. Patrick's Day ( 2 )
- Store collab ( 1 )
- Summer ( 19 )
- Template ( 44 )
- Thanksgiving ( 1 )
- tooshtoosh ( 21 )
- tutorial ( 3 )
- twilight tutorial ( 2 )
- Using my kits ( 1 )
- using my temps ( 8 )
- Valentines ( 8 )
- verymany ( 2 )
- Winter ( 8 )
- Zindy ( 2 )
- zlata ( 1 )
My TOU
By downloading any of my items, you agree to the following TOU:
All items I provide on this blog are my own creations.
Any resemblance to another product is strictly coincidental.
Please do not share anything I create!
Do not claim as your own. Give credit where it is due!
If you use them for challenges, please link back to my blog.
If you use them in tutorials, please link back to my blog.
If you use any of my creations, I would love to see it!! Feel free to email them to me, anytime & I will display them on my blog!!
Blog: http://sarahstagsthings.blogspot.com/
My Email: Smcmanus44@gmail.com
Thank you!!


