Tuesday, October 30, 2012
Freebie!!--Masks
3:05 PM
|
Posted by
♥-Sarah-♥
|
These are my first-ever masks!!
I was playing around in Photoshop--which I am currently learning--& I made these.
Hopefully someone can use them for something.
Just right-click and save =)
Labels:
Freebie
,
Mask
|
1
comments
Saturday, October 27, 2012
Witches Be Crazy
10:32 PM
|
Posted by
♥-Sarah-♥
|
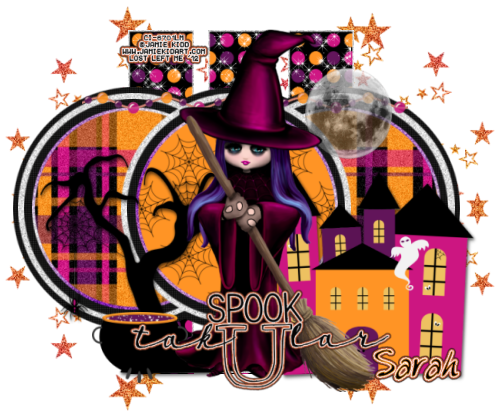
I used a couple of new witch tubes from Toosh Toosh to make this tag.
Aren't these creepy chicks awesome???
Find all the new TooshToosh tubes HERE
Grab a snag if you'd like =)
Happy Halloween!
Labels:
Halloween
,
Snags
,
tooshtoosh
|
0
comments
Wednesday, October 24, 2012
New kit!!--New tuts!!! SALE SALE SALE!!
7:21 PM
|
Posted by
♥-Sarah-♥
|
Time for a new kit!!
This one is Thanksgiving themed, perfect for all those Thanksgiving tags!!
It's tagger-sized with 43 Elements and 8 Papers.
Available at all 3 of my stores!!
Be sure to check out my 45% off SALE at Heartfelt Perfections & Whimsical Divas!
Now for some great new tuts from my awesome CT!!
Click each tag to be taken to the tut!
-From Alisha-
-From Rachel-
Thanks so much for these great tags/tuts girls!!
♥♥♥♥
Labels:
CT Tags
,
PTU Kit
|
0
comments
Tuesday, October 16, 2012
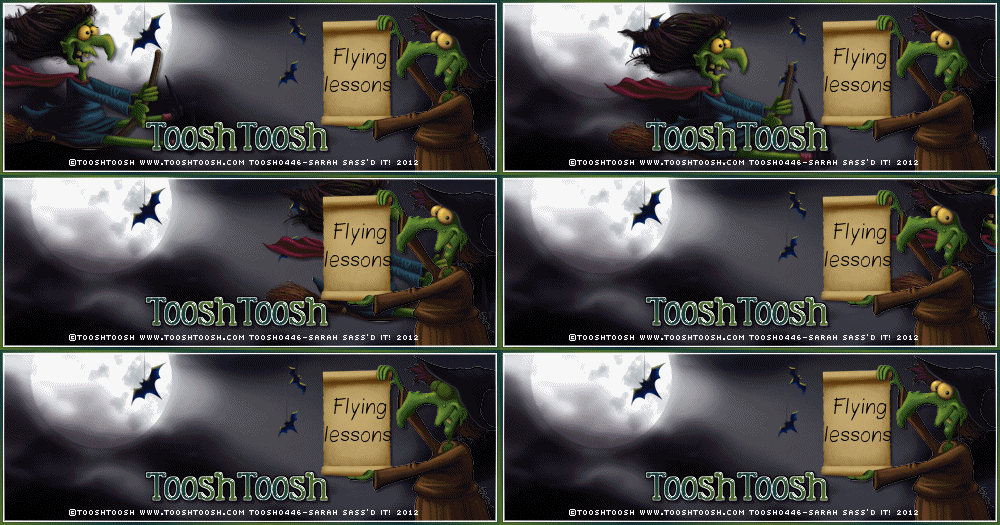
Flying Lessons-FTU
10:12 AM
|
Posted by
♥-Sarah-♥
|
For this tutorial, you’ll need a working knowledge of PSP.
I’m using PSP X4 but any version should work.
This tutorial is my own and any resemblance to any other is purely coincidental.
Supplies for this tutorial:
PSP (any version)
FTU Scrap kit-Spooktacular
You can get it here
Tubes from TooshToosh here: www.tooshtoosh.com
You must have a license to use this tube.
Do NOT use this tube without the proper license!!!
Animation shop
::Let’s begin::
Open new image 500*175
Copy and paste a paper for your background, from the kit.
You can also copy & paste any of the other elements you’d like to include in your tag.
I only used the hanging bats b/c I’ll be animating & don’t want my tag too busy.
(Busy tags bother me..lOl)
Add a drop shadow to any of the elements you choose to add.
Copy and paste your tubes where you’d like.
To my witch with the scroll, I added some text to the scroll.
At this point, I added my © info
I added the name as well as a border around my banner.
Once that’s done I’m ready to animate.
I place my flying with in the left hand side of my tag
Copy merged
In Animation Shop (AS)
Paste as new animation
Back to PSP
I move my flying witch down and over a bit
Copy merged
Back to AS
Paste after current frame
Back to PSP--
Continue to move the witch in a “flying” motion,
Copying-merged & pasting after previous frames in AS until the witch is completely out of the frames.
Back in PSP--
Once your flying witch it out of the frame,
Copy and paste another pair of the eyes that came with your witch tube.
(I used the closed eyelids)
Resize them to fit her face.
Copy merged
In AS-
Paste after current frame
In PSP
Hide the eyes you just pasted
Copy merged
Paste after current frame in AS
Now---time to animate
Select all frames
Animation
Frame Properties
Change the # in the box until you’re happy with the speed of your animation.
I think I used 30.
Review your animation.
Once you’re happy with it,
Save!
Labels:
Animated
,
FTU Tut
,
Halloween
,
tooshtoosh
|
0
comments
Monday, October 15, 2012
Toosh O'Ween-FTU
10:02 AM
|
Posted by
♥-Sarah-♥
|
For this tutorial, you’ll need a working knowledge of PSP.
I’m using PSP X4 but any version should work.
This tutorial is my own and any resemblance to any other is purely coincidental.
Supplies for this tutorial:
PSP (any version)
FTU Scrap kit-Gothic Halloween here: http://kittzkreationz.blogspot.com/2011/09/gothic-halloweencoming-soon.html
Template 160 here: http://punkybuttstutorialsii.blogspot.com/
Freebie tubes from TooshToosh here: www.tooshtoosh.com
You must have a license to use this tube, even though it’s free!!
Do NOT use this tube without the proper license!!!
::Let’s begin::
Open the template
Delete all the text layers
Fill each shape of the template with a paper from kit by selecting the shape
Float
Defloat
Copy and paste paper as new layer
Seletions
Invert
Delete
Select none
Do this for each part of your template
Colorize your glittery frames to match the colors of the kit you’re using.
Now we’re going to add our elements from the kit.
I used the following:
Stick
Skull frame
Candles
Pumpkin
Copy
Paste
Resize
Place
& add drop shadow to each element you add.
Next
Copy and paste your tube
Add drop shadow
Crop your tag down
Resize if you need to
Add your © info
Add your name/text
Save!
Labels:
FTU Tube
,
FTU Tut
,
Halloween
,
tooshtoosh
|
0
comments
Saturday, October 13, 2012
New Tuts!!
6:19 PM
|
Posted by
♥-Sarah-♥
|
Two of my really awesome friends used my kits to make these way awesome tags/tut!!
Check out this fab tag/tut made by Leah
using my 'Booga Booga' kit.
Click the tag to go to the tut:
This awesome tag/tut was made by Amy
using my 'Harvest Time' kit.
Click tag to go to her tut:
Labels:
CT Tags
,
Made w. my kits
|
0
comments
New kit-Harvest Time!
1:51 PM
|
Posted by
♥-Sarah-♥
|
New kit in both stores!!
On sale now!!
Only 83 CENTS!!!!!!
Don't forget, the rest of my kits are all 45% off until the end of the month!!! Grab 'em while you can at great prices!!!
&
Labels:
Fall
,
PTU Kit
|
0
comments
Wednesday, October 10, 2012
Shh..Secrets
3:31 PM
|
Posted by
♥-Sarah-♥
|
For this tutorial, you’ll need a working knowledge of PSP.
I’m using PSP X4 but any version should work.
This tutorial is my own and any resemblance to any other is purely coincidental.
Supplies for this tutorial:
PSP (any version)
PTU Scrap kit-I’ve Got a Secret here: http://sinfullycreativescraps.blogspot.com/
Tube by Suzanne Woolcott here: http://www.gorjussarthome.com/store/
::Let’s begin::
Open a new image 800*600
Copy frame of choice
Paste as new layer in your canvas
Resize if you need to.
Click inside frame w/ magic wand
Selections
Modify
Expand by 4
Copy and paste a paper from the kit
Selections
Invert
Delete
Select none
Move below frame
Effects
Texture effects
Weave:
Gap-1
Width-8
Opacity-2
Both colors set to white
Fill gaps checked
-OK-
Add drop shadow to your frame
Copy and paste black butterflies if you’re going to use them in your tag as well.
On top of the frame:
Copy and paste your tube
Add drop shadow of choice
Now time to layer all the elements you want included in your tag.
Resize as you go if you need to.
Remember to add a drop shadow to each element you add as well.
I used the following:
Element 11
Element 16
Element 18
Element 22 (behind frame)
Element 45
Element 47
Finish adding all the elements to your tag
Merge visible
Crop down and resize if you’d like
Add your © info
Add names/text
Save!
Labels:
Gorjuss
,
PTU Tut
|
0
comments
Monday, October 8, 2012
CT-Tut
3:55 PM
|
Posted by
♥-Sarah-♥
|
Labels:
CT Tags
,
Halloween
|
0
comments
CT Tut
12:13 PM
|
Posted by
♥-Sarah-♥
|
I LOOOOOOOOOOVE this beautiful tag Kaci made using my
Bliss to me kit!!
Click the tag to check out her wonderful tut!
THANKS KACI!!
Labels:
CT Tags
,
Fall
|
0
comments
Tuesday, October 2, 2012
SALE!! SALE!! SALE!!!
12:54 PM
|
Posted by
♥-Sarah-♥
|
I'm having a month-long sale in both of my stores!!!
45% off all of my products
until October 31st!!
Grab this deal while it's going on!
I won't have another sale until
Black Friday!!!!
&
Labels:
SALE
|
0
comments
Subscribe to:
Posts
(
Atom
)
Old Temps
Older templates can be downloaded HERE
Background created by Sarah-Scrap kit by Just So Scrappy. Powered by Blogger.
Lables
- 12 Days of Christmas Freebie ( 12 )
- 4th Of July ( 3 )
- Animated ( 16 )
- award ( 6 )
- baby ( 1 )
- blog train ( 1 )
- Caron Vinson ( 3 )
- Christmas ( 22 )
- city ( 1 )
- country ( 1 )
- CT call ( 1 )
- CT Tags ( 17 )
- CU ( 1 )
- CU Freebie ( 5 )
- Easter ( 2 )
- Elias Chatzoudis ( 28 )
- emo ( 5 )
- Facebook cover ( 1 )
- Fall ( 14 )
- forum set ( 2 )
- Frame ( 2 )
- Freebie ( 25 )
- Frieng Gifts ( 2 )
- FTU ( 6 )
- FTU Kit ( 8 )
- FTU tag ( 3 )
- FTU tag. Garv ( 1 )
- FTU Tube ( 4 )
- FTU Tut ( 30 )
- Garvey ( 10 )
- girly ( 1 )
- Gorjuss ( 11 )
- Halloween ( 7 )
- haloween tut ( 6 )
- holiday ( 1 )
- Joel adams ( 4 )
- Jose Cano ( 7 )
- Josh Howard ( 1 )
- Lady Mishka ( 5 )
- Made w. my kits ( 14 )
- Mask ( 1 )
- native ( 1 )
- Nene Thomas ( 1 )
- new year ( 3 )
- NEWS ( 2 )
- No Tube ( 3 )
- pinuptoons ( 3 )
- PTE ( 1 )
- PTU ( 3 )
- PTU CU ( 2 )
- PTU Kit ( 20 )
- PTU tags ( 58 )
- PTU Tut ( 127 )
- RAC ( 29 )
- Rac Tutorial ( 15 )
- Robert Alvarado ( 1 )
- SALE ( 5 )
- School ( 1 )
- Show Off ( 9 )
- Snags ( 2 )
- Spring ( 4 )
- St. Patrick's Day ( 2 )
- Store collab ( 1 )
- Summer ( 19 )
- Template ( 44 )
- Thanksgiving ( 1 )
- tooshtoosh ( 21 )
- tutorial ( 3 )
- twilight tutorial ( 2 )
- Using my kits ( 1 )
- using my temps ( 8 )
- Valentines ( 8 )
- verymany ( 2 )
- Winter ( 8 )
- Zindy ( 2 )
- zlata ( 1 )
My TOU
By downloading any of my items, you agree to the following TOU:
All items I provide on this blog are my own creations.
Any resemblance to another product is strictly coincidental.
Please do not share anything I create!
Do not claim as your own. Give credit where it is due!
If you use them for challenges, please link back to my blog.
If you use them in tutorials, please link back to my blog.
If you use any of my creations, I would love to see it!! Feel free to email them to me, anytime & I will display them on my blog!!
Blog: http://sarahstagsthings.blogspot.com/
My Email: Smcmanus44@gmail.com
Thank you!!


