Friday, October 29, 2010
Thank you & New Tutorial!
Want to give a HUGE thank you to my awesome friend Kelly for making my new blinkies and my fabby header!
Thanks so very much dear! I just love them!!!
Also have a new tutorial for you guys! It's short, simple, and easy to follow!

For this tutorial, you’ll need a working knowledge of PSP.
I’m using PSP 9 but any version should work.
This tutorial is my own and any resemblance to any other is purely coincidental.
Supplies for this tutorial:
PSP (any version)
Scrap kit of choice.
I’m using the PTU kit: Gangster Babe from Angel’s Designz.
You can get her kits here: http://angelsdesignz.blogspot.com/
Tube of choice: I’m using the wonderful work of Keith Garvey.
You can find these tubes here: www.mypsptubes.com
This is going to be short and simple.
Ready--Lets begin!!
Open a new canvas (I star with 800x600 and crop at the end.
Copy the mesh2 from your kit & paste into your canvas. Resize as you wish.
Next, use your ellipse tool and draw out a circle. Make the width 20
And the background color null.-Convert this to raster layer
-Click the wide part of your circle with your magic wand.
Select a paper from your kit-Copy-Back to your canvas- Paste INTO selection. Deselect.
Copy & paste your tube on top of your frame layer. Add drop shadow.
Select a ribbon from your kit. Copy & paste into your canvas. Move below your tube layer . Add drop shadow.
Next, copy and paste your brass knuckles. Resize and place to the bottom left of your from on top of your ribbon layer. Add your drop shadow.
Copy and paste a gun from your kit. Resize and add drop shadow.
Add your bullets above your gun layer. Resize them and add a drop shadow.
Select your frame layer. Click inside it with your magic wand.
Selections-Modify-Expand by3 (Do NOT Deselect) Add new raster layer.
Copy a paper from your kit.-Paste INTO selection. Deselect.
Move this paper layer under your frame layer and add drop shadow to your frame
Copy a word art from your kit. Paste into your canvas. Add an outline using your gradient glow & add a drop shadow.
Now crop your tag to the size you want it to be.
Add your text and your copyright info.
Merge all and save.
There you have your finished product!
Hope you enjoyed this tut!
Thursday, October 28, 2010
Excuse my mess
I am in the process of redoing my blog--Which is a mess..lOl
I'm not great at it BUT I need something different.
So please excuse me while I get things situated.
PTU Tut-Boo!

For this tutorial, you’ll need a working knowledge of PSP.
I’m using PSP 9 but any version should work.
This tutorial is my own and any resemblance to any other is purely coincidental.
Supplies for this tutorial:
PSP (any version)
Animation shop
Scrap kit of choice.
I’m using the PTU kit: UnBOOlievable By Tammy’s Scraps
You can get her kits here: www.scrappetizing.com/store
Be sure to check out her blog: www.tammysscraps.blogspot.com
Thanks so much Tammy! This kit is ADORABLE!!
Tube of choice-It’s a poser from the kit.
Mask 230 from Weescottlass- www.weescotslasscreations.blogspot.com
Open a new canvas-800x600 (we crop later)
Use your ellipse tool and draw out a circle.
Convert to raster layer & click with your magic wand. Do NOT deselect!
Select a paper from your kit and paste INTO selection.
Select none.
Select spider web 3 from your kit-Paste under your frame and resize/erase so there is none hanging outside of your frame.
Use your magic wand to select inside your circle.
Selections-Modify-Expand by 3-Add new raster layer.
Select another paper from your kit-Copy.
Back to your canvas-Paste INTO selection.
Deselect and move under your frame & spider web layers.
Add a drop shadow to your frame.
Now select any elements & word art you want to include.
Resize them and place how you wish.
Don’t forget to add your drop shadow to each of them.
Next select your background paper.
Copy & paste below all of your other elements in your canvas.
Add your mask layer to this.
**Now to animate!**
Crop and resize.
Add whatever copyright info & text. Merge all.
Duplicate 2 times. (You will have 3 layers)
Use your magic wand. Select whatever you want to have glitter.
On your first layer:
Adjust-Add noise-
Uniform-Monochrome checked-Noise 35%
Your next layer-everything the same EXCEPT noise is 45%
Third layer-Everything the same EXCEPT noise is 55%
Now save as animation file.
GO over to your animation shop & open it up.
View animation-Save as .gif and you’re done!
Thanks for trying my tut!
Monday, October 25, 2010
Fall Dream-PTU Tutorial

For this tutorial, you’ll need a working knowledge of PSP.
I’m using PSP 9 but any version should work.
This tutorial is my own and any resemblance to any other is purely coincidental.
Supplies for this tutorial:
PSP (any version)
Scrap kit of choice.
I’m using the PTU kit: Autumn Bliss By Tammy’s Scraps
You can get her kits here: http://www.scrappetizing.com/store/
Be sure to check out her blog: http://www.tammysscraps.blogspot.com/
Tube of choice. I’m using is by : Caron Vinson
But you can find these tubes here: www.cilm.com
You MUST have a license to use these tubes. Don’t use them without a license!
Let’s begin:
Open a new canvas-800x600 (we crop later)
Use your square tool and draw out a square in the center of your canvas.
Make your background color null and your width about 25.
Convert to raster layer.
Select a paper from your kit-Copy
Use your magic wand to select the color part of your square.
Edit-Paste INTO selection.
-Select None-
Select your leaves element -Copy& paste into your canvas behind your frame.
Select your humming bird & flowers element.
Copy & paste into your canvas-resize if needed and move to the top left corner of your frame.
Add your drop shadow.
Copy & paste your tube into your canvas. Resize of needed and add drop shadow.
Select your autumn bliss sign 1. Copy & paste as new layer under your tube layer.
Add your drop shadow.
Copy & paste your autumn flower1. Add drop shadow.
Find an autumn background you like. Copy it.
Use your magic wand. Click inside your frame.
Add new raster layer. Selections-Modify-Expand by 3.
Paste INTO selection. Move this layer below your frame layer.
Duplicate this. Change the blend mode to overlay. Merge down.
Add drop shadow to your frame.
Crop your tag to your liking.
Resize. Add your copyright info & any text.
Save & enjoy your new taggie!
Thanks for doing my tut!
Sunday, October 24, 2010
PTU-TooshToosh Autumn Bliss

For this tutorial, you’ll need a working knowledge of PSP.
I’m using PSP 9 but any version should work.
This tutorial is my own and any resemblance to any other is purely coincidental.
Supplies for this tutorial:
PSP (any version)
Scrap kit of choice.
I’m using the PTU kit: Autumn Bliss By Tammy’s Scraps
You can get her kits here: http://www.scrappetizing.com/store/
Be sure to check out her blog: http://tammysscraps.blogspot.com/
Tube of choice. I’m using is by TooshToosh
But you can find these tubes here: www.tooshtoosh.com
You MUST have a license to use these tubes. Don’t use them without a license!
Let’s begin:
Open a new canvas-800x600 (we crop later)
Use your square tool and draw out a square in the center of your canvas.
Make your background color null and your width about 25.
Convert to raster layer.
Select a paper from your kit-Copy
Use your magic wand to select the color part of your square.
Edit-Paste INTO selection.
-Select None-
Add your tube.- Add drop shadow.
Open your grass from your kit. Copy-Paste as new layer. (Under your tube layer)
Open your wheat element from your kit. Copy & paste it as a new layer under your grass layer.
Resize as needed and add your drop shadow.
Open your basket of apples. Edit-Copy-Paste as new layer. Resize & add drop shadow.
Open a butterfly from your kit. Copy & paste into your canvas. Resize.
Tilt to the right and move to the upper left corner. Add drop shadow.
Open the autumn bliss word art. Copy & paste into your canvas. Resize and add drop shadow.
Select a tree from your kit. Copy & paste behind your tube layer. Add drop shadow.
Use your magic wand & click inside your frame.
Selection-Modify-Expand by 3.
Copy a paper from your kit. Add new raster layer & paste INTO selection.
Move this under your frame layer.
Add drop shadow to your frame layer.
Duplicate your tube layer.-Mirror & move below your frame layer.
Erase any parts hanging out from your frame. & add drop shadow to this tube layer.
Change the blend mode to luminance.
Crop as desired & add your copyright info and any text.
Save & enjoy your new tag!
Friday, October 22, 2010
New Tag-FTU-Naughty Garv

I used Kelly's FTU, Naughty or Nice, kit to make this tag.
This is a naughty kit.
Not for the modest..lOl..
It's a fun kit that you'll love to play with.
Check out her blog HERE for this & other awesome freebies!
Thursday, October 21, 2010
PTU Tut-Big Girl Panties

For this tutorial, you’ll need a working knowledge of PSP.
I’m using PSP 9 but any version should work.
This tutorial is my own and any resemblance to any other is purely coincidental.
Supplies for this tutorial:
PSP (any version)
Scrap kit of choice.
I’m using the PTU kit: Karma By Tammy’s Scraps
You can get her kits here: http://www.scrappetizing.com/store/
Be sure to check out her blog: http://www.tammysscraps.blogspot.com/
Tube of choice. I’m using is by Jose Cano
But you can now find his work at www.mypsptubes.com
You MUST have a license to use his work. Don’t use his tubes without a license!
Let’s begin:
Open a new canvas--I use 800x600 & crop when I’m finished.
Use your rectangle tool and draw out a rectangle with the foreground purple & background null.
Adjust>Add noise ( you can use any settings you want to make the frame as glittery as you want)
Effects>3D effects>Inner Bevel.
I’m using a flat bevel.
Width at 15. Smoothness at 52. Depth 22. Ambience 0.
Shininess 4. Angle 45. Intensity 51. Elevation 32.--OK.
Using your magic wand-Click inside your frame.
Selections>Modify>Expand by 3.
Add new layer and flood fill with color of your choice to match your tube.
Copy notebook 2-Paste into canvas and resize. Place on the lower right corner.
Use your raster deform tool to tilt the notebook to the right. Add your drop shadow.
Copy one of the markers from the kit.
Paste into canvas & resize. Place on top of the notebook & add drop shadow.
Copy one of the ribbons from your kit. (I used curled ribbon 3)
Paste into your canvas on top of your frame layer. Resize & rotate 90 degrees to the left.
Add your drop shadow.
Select your Karma Beaded word1-Copy & paste into your canvas.
Resize and move to the right side of your frame. Add your drop shadow.
Open the Karma safety pin. Copy/Paste into your canvas.
Resize & place in the upper left and corner of your frame
Open flower4. Copy/Paste into your canvas.
Resize and place in the bottom left corner on top of your ribbon. Add your drop shadow.
Select your colored layer inside your frame.
Effects>Texture >Blinds> Width 3>Opacity 36-Color white.-OK-
Open your tube. Copy & paste as new layer.
Erase any of your tube hanging out of your frame & add drop shadow.
Select your word art. Copy & paste into your canvas.
Resize and place in the bottom center of your canvas. Add your drop shadow.
Now crop any excess around your tag & resize.
Add your copyright & any text.
Adjust>Sharpen. & Save as .PNG for a transparent background.
Easy enough?
Thanks for trying my tut.
♥♥♥
PTU-SexyRac

For this tutorial, you’ll need a working knowledge of PSP.
I’m using PSP 9 but any version should work.
This tutorial is my own and any resemblance to any other is purely coincidental.
Supplies for this tutorial:
PSP (any version)
Scrap kit of choice.
I’m using the PTU kit: Karma By Tammy’s Scraps
You can get her kits here: http://www.scrappetizing.com/store/
Be sure to check out her blog: http://www.tammysscraps.blogspot.com/
Tube of choice. I’m using is by Ismael Rac
But you can now find his work at http://www.xeracx.net/
You MUST have a license to use her work. Don’t use his tubes without a license!
Let’s begin:
Open a new canvas--I use 800x600 & crop when I’m finished.
Use your ellipse tool and draw out a circle (background null)
Convert to raster layer.
Use magic wand and select the colored part of your circle.
Selections>Modify>Expand by 3.
Choose a paper from your kit, copy it
Go back to your canvas and paste INTO selection & deselect.
Choose flower 7 from your kit. Copy & paste into your canvas.
Use your raster deform tool to resize it and place in the bottom center of your canvas.
Add your drop shadow.
Choose a ribbon from your kit. I used curled ribbon 1. Resize>copy & paste into canvas.
Position under your flower. Duplicate this layer & mirror it.
Add your drop shadow to both ribbon layers.
Select your Karma bling from your kit. Resize it & copy>Paste into your canvas.
Place it under your frame and erase any excess hanging outside of the frame.
Select a paper from your kit. Copy
Go back to your canvas, using your magic wand, click INSIDE your frame layer.
Add new raster layer. Selections>Modify>Expand by 3 and paste INTO layer.
Move your paper UNDER your frame & your bling layers.
Add a drop shadow to your frame layer.
Copy & paste your tube into your canvas on top of your bling layer.
Duplicate your frame layer and put one under your tube layer.
Select the frame layer on top of your tube and erase any parts of the frame that cover your tube’s face.
Add drop shadow to your tube layer.
Select the leaves element. Resize & place under all other layers of your tag.
Rotate and position as desired. Duplicate & mirror. Add drop shadow to both leaf layers.
Merge visible & resize.
Adjust>sharpen.
Add your copyright info and any other text you want on your tag.
Save & you’re finished!
Thanks for trying my tut! Feel free to send me any results you have from this or any of my tutorials.
♥♥♥
Tuesday, October 19, 2010
New Tag!-Gobble Gobble!!
You guys have GOT to check out this AWESOME kit from Kelly @ Angel's Designs!
It hasn't been released yet. But will be available Oct. 31st.
Check out her blog *HERE* for more info on where it will be released!
Here's the preview to this kit:

Looks awesome doesn't it!!!
Well, that's because it IS!!!!!!!!!!!!!!!!!!!!! Hahaha
Ok, ok, Here is the tag I made with it:

After the kit is released, I will tut this tag as well as another I plan to make.
Don't forget to keep an eye out for it!!
Thanks for stopping by!!!
♥♥♥
Spoooky Treats Freebie
Hey guys, it's freebie time.
I made this little frame with Kelly's awesome kit, Spooky Treats.
Be sure eto check out her blog for her awesome kit & freebies!
--HERE--
This is what I used the frame with. My husband & I took our girls and one of our friend's daughters out with us to a dairy barn here that had a corn maze & tons of fun stuff for Fall. It was a great day!
You can tell they were having loads of fun!
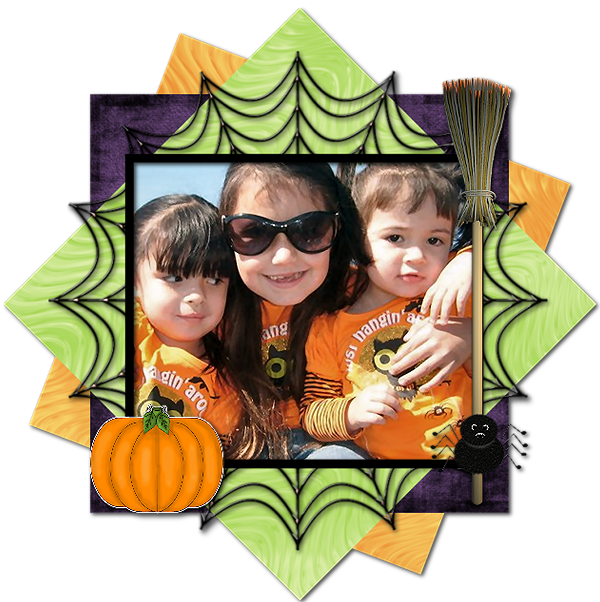
If you like the frame, feel free to download but please leave some ♥!
Download HERE
Thanks for stopping by & be sure to come back soon!
*hugs*
Sunday, October 17, 2010
PTU Tag-Garv Floral

I made this tag using Kelly's awesome kit
Floral Surprise.
It's soOo pretty!
Thanks so much Kelly!
Check out her blog HERE for info on how you can get it
As well as her other fabulous kits!
Snow Cutie-Tut-

For this tutorial, you’ll need a working knowledge of PSP.
I’m using PSP 9 but any version should work.
This tutorial is my own and any resemblance to any other is purely coincidental.
Supplies for this tutorial:
PSP (any version)
Scrap kit of choice.
I’m using the PTU kit: Snow Princess from Tammy' Scraps
Be sure to check out her blog: http://tammysscraps.blogspot.com/
For info on where you can find her fabulous kits!!
Tube of choice. I’m using Ismael Rac. I got this one while he was still at AMI.
But you can now find his work at http://www.xeracx.net/
You MUST have a license to use his work. Don’t use his tubes without a license!
Weescottlass Mask 302 here: http://weescotslasscreations.blogspot.com/
Plug-in: Alienskin Xenofex 2 constellation
This one is going to be short and simple. Lets begin.
Open a new canvas--Make it pretty big. I’m using 1000x800 (we’ll crop and resize later.
Select your tube. Copy & paste into your canvas.--Add drop shadow.
Select a fence element from your kit. Copy & paste.
Post behind and to the right of your tube.
Duplicate this layer & mirror it.--Add a drop shadow to both fence layers.
Open your signpost 1 from your kit. Copy & paste it into your canvas & move to the right.
Add your drop shadow to it. (If you want to add text to the planks on the sign, you can do this now.)
Open Christmas tree 1-Copy & paste into your canvas--Move to the left. Add drop shadow.
Open up Rudolf 1-Copy & paste into your canvas. Position where you want it, resize. Add drop shadow.
Open up one of the snowmen from the kit. Copy and paste into your canvas. Resize and position where you want it. Add your drop shadow.
Use your rectangle selection tool to crop your tag down and resize.
Select a color from your tag--I chose a light pink.
Flood fill your background layer.
Open your mask up.--Add mask layer to your tag & resize as desired.
Merge group and use your Constellation effect to add some sparkles to it.
I just use random seed with my twinkle amount and overdrive all the way to 100.
Merge visible, add your text info & copyright. Save as .png for a transparent background.
And that does it. Thanks to anyone that tries out my tut!
Saturday, October 16, 2010
Sweet Twilight

For this tutorial, you’ll need a working knowledge of PSP.
I’m using PSP 9 but any version should work.
This tutorial is my own and any resemblance to any other is purely coincidental.
Supplies for this tutorial:
PSP (any version)
Scrap kit of choice.
I’m using the PTU kit: Twilight from Angel’s Designz.
You can get her kits here: http://angelsdesignz.blogspot.com/
Tube of choice: I’m using the wonderful work of Zindy Nielsen.
This is a freebie tube I got on the site.
You can find these tubes here: http://zindy-zone.dk/
Let’s begin!
Open a new canvas-I use 800x600 & resize when im done.
Using your rectangle tool, make your foreground black and background null.
Your line width should be about 14.
Draw out your rectangle.-Convert to raster.
Effects-3D Effects-And do an inner bevel.
Select a ribbon from your kit. Edit-Copy
Go to your canvas and paste as new layer.
Make any adjustments you need & add your drop shadow.
Next, choose a flower from your kit. I used flower 2. Edit copy.
Go back to your canvas & paste on top of your ribbon layer.
Resize & adjust to your liking then add your drop shadow.
Choose another flower from your kit (I picked the lilies) Edit-Copy
Go back to your canvas & paste under your first flower but over your ribbon layer.
Resize and adjust as needed and drop shadow.
Go to your kit and choose the musical notes. Edit-Copy
Paste into your canvas behind your frame.
Adjust & resize as desired-Duplicate these and mirror
Move to the bottom right hand corner-Add drop shadow
Choose a paper for your kit that you want as the background in your frame.
Edit-Copy
Use your magic wand to click inside the frame
Selections-Modify-Expand by 3
Add new raster layer & Paste INTO selection
Move this layer below your frame layer
Add a drop shadow to your frame layer.
Select your tube-Copy & paste into your canvas.
Position and crop as needed.
Add your drop shadow.
Using your rectangle selection tool, crop the canvas down and resize to where you want it.
Add your Name & copyright info.-Merge all--We are going to add some glitter!
Duplicate your tag 2 times. (You should have 3 layers.)
Use your magic wand to select where you want your glitter. I’m doing the name.
Select your top layer.
Adjust-Add noise-Gaussian-Monochrome-Noise 35%-OK
Select the second layer-Adjust-Add noise-Same settings except change it to 45%
Select third layer-Adjust-Add noise-Same settings except change to 55%
Save as Animation shop image.
Open in Animation shop & save as a GIF file & you’re finished!
Hope you enjoyed this tut. Feel free to send me anything you make with it or email me with questions!
Thursday, October 14, 2010
Gorjuss Snow Princess.
I know it's only October but I love the snow!! When i lived in Montana, we got our first snow October 5th last year..lOl..I must say, I miss it!! SoOo I did this tut with a fabulous kit from Tammy's Scraps.
Thanks so much Tammy! This kit is awesome!!
Please keep in mind this is my FIRST tut with animation!
If you have any questions, please don't hesitate to Email me!

For this tutorial, you’ll need a working knowledge of PSP.
I’m using PSP 9 but any version should work.
This tutorial is my own and any resemblance to any other is purely coincidental.
Supplies for this tutorial:
PSP (any version)
Scrap kit of choice.
I’m using the PTU kit: Snow Princess
You can get her kits here: http://www.scrappetizing.com/store/
Be sure to check out her blog: http://tammysscraps.blogspot.com/
Tube of choice: By Suzanne Woolcott
You MUST have a license to use her work. Don’t use her tubes without a license!
You can find them here: http://gorjussart.com/store
Plug-in VanDerLee Snowflakes: http://www.vanderlee.com/plugins_snowflakes_download.html
Let’s begin!
Open a new canvas: 800x800 (you can crop and resize later)
Use your rectangle tool-Foreground -your color of choice, background- null.
Draw out a rectangle with the width set at 23. Convert this rectangle to raster level.
Effects>3D effects>Inner bevel with these settings:
Smoothness:30 Angle:45
Depth:6 Intensity:50
Ambience:31 Elevation:30
Shininess:19
Using your magic wand, click INSIDE the rectangle.
Selections>Modify>Expand by 3
Add new layer
Select a paper from your kit. I used paper 15
Edit>Copy
Go back to the layer you just added-Edit>Paste INTO selection.
Move paper layer UNDER your rectangle layer.
Deselect & add drop shadow of your choice to your rectangle layer.
Select the Christmas lights from your kit. Resize ( I used my raster deform tool)
And place on the bottom of your frame.-Add your drop shadow.
Select a bow from your kit-Paste into your canvas and resize to your liking
& place in the upper left corner of your frame. Add drop shadow
Select princess flower3 from your kit. Copy & paste into your canvas.
Resize and move to the left side of your frame. Add drop shadow
Select princess flower2 from the kit. Copy & paste into your canvas.
Resize and place on top of your first set of flowers-Add your drop shadow.
Copy and paste element Rudolf1 into your canvas.
Resize and move to the lower right hand corner or your frame.
Add your drop shadow.
Select your tube/Copy. Click on your paper layer.
Edit>Paste as new layer.
Add drop shadow to your tube layer.
Select your frame layer>Duplicate--Move this duplicated layer UNDER your tube layer.
Go back to your original frame layer and erase any parts of the frame covering your tube.
Now duplicate your tube layer & move it under your original tube layer.
Move it to the left--Parts of it may hang out of the sides and bottom but that’s ok
Delete anything hanging out.
Now duplicate this layer. Change the blend mode to screen. Merge down.
And change the opacity to 65.
Duplicate this layer>Image>Mirror
Adjust the position of the tube if needed.
--Now--
Merge your two copies of your tube down then merge this layer with your tubes down.
Then merge this layer down . (Your copied tubes & the original frame & paper should all be one layer now.
Make this layer inactive (Click on the little eye)
Add your copyright & any name/text you want on it.
Merge VISIBLE.
This is the time you need to crop your tag. & resize to where you want it when it’s finished.
We’re going to animate!
Select your bottom layer>Select All>Float>defloat
Kepp selected!! Add new raster layer
Using your VanDerLee Snowflakes plug-in use Hardness 130 & the rest as the default settings
Delete any snow on your frame.
Select none.
Merge all-Copy-Paste into Animation shop
Go back to PSP-Undo until there are no snowflakes on your tag
Do the same steps two more times, except hit your random seed a couple of times on your snowflakes
Paste each of your new frames into animation shop-AFTER current frame.
Change your animation settings to 18
Save as .GIF and you’re done.
Hope you got all of that..LOL..I’m still new & this is my first animated tut.
Any questions, feel free to email me!
Tuesday, October 12, 2010
Frame Freebie

Monday, October 11, 2010
A couple more tags
I've been a little busy this evening!
I made a couple more tags with two of Kelly's older kits.
They are awsome and I'm sure you will love them!!
Check out her blog HERE for all info on where you can snag her kits as well as her freebies!!
I made this tag with her Pumpkin Patch kit:
And I made this one with her Just a crush kit:

Both kits are fantastic!!
Thanks so much Kelly :)
Till next time folks!!
XoXo
♥-Gorjuss Sunflowers-♥

For this tutorial, you’ll need a working knowledge of PSP.
I’m using PSP 9 but any version should work.
This tutorial is my own and any resemblance to any other is purely coincidental.
Supplies for this tutorial:
PSP (any version)
Scrap kit of choice.
I’m using the PTU kit: Sunflowers by Angel’s Designz.
You can get her kits here: http://angelsdesignz.blogspot.com/
Tube of choice: I’m using the wonderful work of Suzanne Woolcott.
This is a tube you MUST have a license to use. Don’t use her tubes without a license!
You can find them here: http://www.gorjussart.com/store/
On to the tut!!x
Open a new canvas--I go bigger with 800x600 (you can always crop later)
Open a frame from the kit--I used the circular frame 2.
Copy & paste into your canvas--resize to your liking (I used my raster deform tool)
Open your tube-Copy and paste into your canvas. Position in the center of your frame.
Go back to your frame layer--Duplicate, and move this layer above your tube layer.
Erase any part of the top frame that is covering your tube’s face or head.
Now click your tube layer and erase any part of your tube sticking out of the bottom.
Open one of the sunflower doodles ( I used the sunflower doodle 2)
Edit>copy>paste into your canvas on top of the top frame layer.
Resize and position to the right.
(If you have any part of the doodle covering the face of your tube, simply duplicate the doodle layer,
Move it below your tube layer, go to the top doodle layer and erase anything covering your tube’s face)
Open one of the grass elements from your kit-Copy>paste into your canvas>Resize and place beneath your flower doodle layer.
Open Branch 1-Copy & paste into the canvas on top of the frame layer.>Resize and add drop shadow.
Open one of the bows from the kit. Copy/Paste/Resize and place overtop of the Branch element.
Add your drop shadow.
Open one of your butterflies from the kit. Copy/Paste into your canvas.
Image>Mirror so it’s facing to the left.
Resize and place in the upper right of your tag.
Use your raster deform tool to tilt it to your liking.
Grab a paper from your kit. Edit>copy
Select your BOTTOM frame layer . Use your magic wand to click inside it.
Selections>Modify>Expand by 3
Add new raster layer
Edit paste INTO layer.
Move this paper layer below your frame layer.
Add a drop shadow to all the layers that you haven’t yet.
Now you can crop your tag to whatever size you want.
Add your copyright info and your name.
Save it and you’re finished!
Thanks for doing my tut! Hope you enjoyed it.
Tuesday, October 5, 2010
Gorjuss Vinyard
Hello all!! Wanted to share with you what I made with one of Kelly's newest kits, The Vinyard.
Hop on over to her blog HERE to see this beautiful kit,
as well as get info on where you can buy it!!
Thanks Kelly, this kit is GORGEOUS!!
(or in this case, GORJUSS..haha)
Here's the tag I made with this kit:

You'll love this kit!!
For those of you that stop by for tuts, I am sorry.
I have been slacking! Lol..
Lots of family issues we're dealing with right now.
I hope to have new tuts soon as well as some new freebie clusters & other goodies soon!!
Till next time friends!
XoXo
Sunday, October 3, 2010
DVA-Tag
October is Domestic Violence Awareness month.
Crystal from Crystal's Creations has a PTU kit for this cause.
I used it to make a name siggy.
I love the purple in this kit!!
Check out her blg HERE for her freebies.
And one store she sells at HERE for her kits.
Thanks Crystal for this kit! I thought of a few very special people when I made this tag.

XoXo
Toxic Love Set
Heller, heller again! lOl..
Wanted to show off this 3 piece set I made for Kelly over at Angel's Designz.
I used one of her newer kits called Toxic Love to make these tags.
You can find it & all of her new kits & her freebies HERE
Here's the set i made:


Wanted to show off this 3 piece set I made for Kelly over at Angel's Designz.
I used one of her newer kits called Toxic Love to make these tags.
You can find it & all of her new kits & her freebies HERE
Here's the set i made:


Be sure to check out her blog--She has DAILY freebies!!!
Thanks for coming by!!
XoXo
Subscribe to:
Posts
(
Atom
)


